
Warning – long post, picture-rich.
Today I had a lovely long session in the studio and really cracked on with my pages. They are nearly all complete now, and I shall soon be able to think about binding them into a book.
Today I started adding text to a selection of pages, and adding some leaves and flowers and other embellishments. Here are the pages I have done.
Strong Tower Pages
This is still a work in progress. I am working on the LH page to go with the photo of the path to the obelisk, and I applied some Polyfilla through my own brick stencil that I drew in Inkscape and cut with Sheba (Cougar cutting machine) some time ago.

I sprinkled on three different colours of Infusions, using a soft brush.

Spritzed with water to activate the powder.

I then left this to dry and will work on it another day. I’m not sure how this is going to progress yet.
Friends Pages
I chose two quotes from the Book of Proverbs in the Bible for this page spread – lovely words about friendship, to accompany the two photos I took of my hubby and his friend walking ahead of us in the distance. The quote for the right-hand page I typed on the computer and printed it out, and cut the text into strips which I glued down onto the page.
I used the edge of a credit card to apply ink to the edges of the text strips, and then added a bit more ink to soften the white paper, using an Inkylicious Ink Duster.

The final touch was to distress the edges of the pages, using a home-made blending pad.
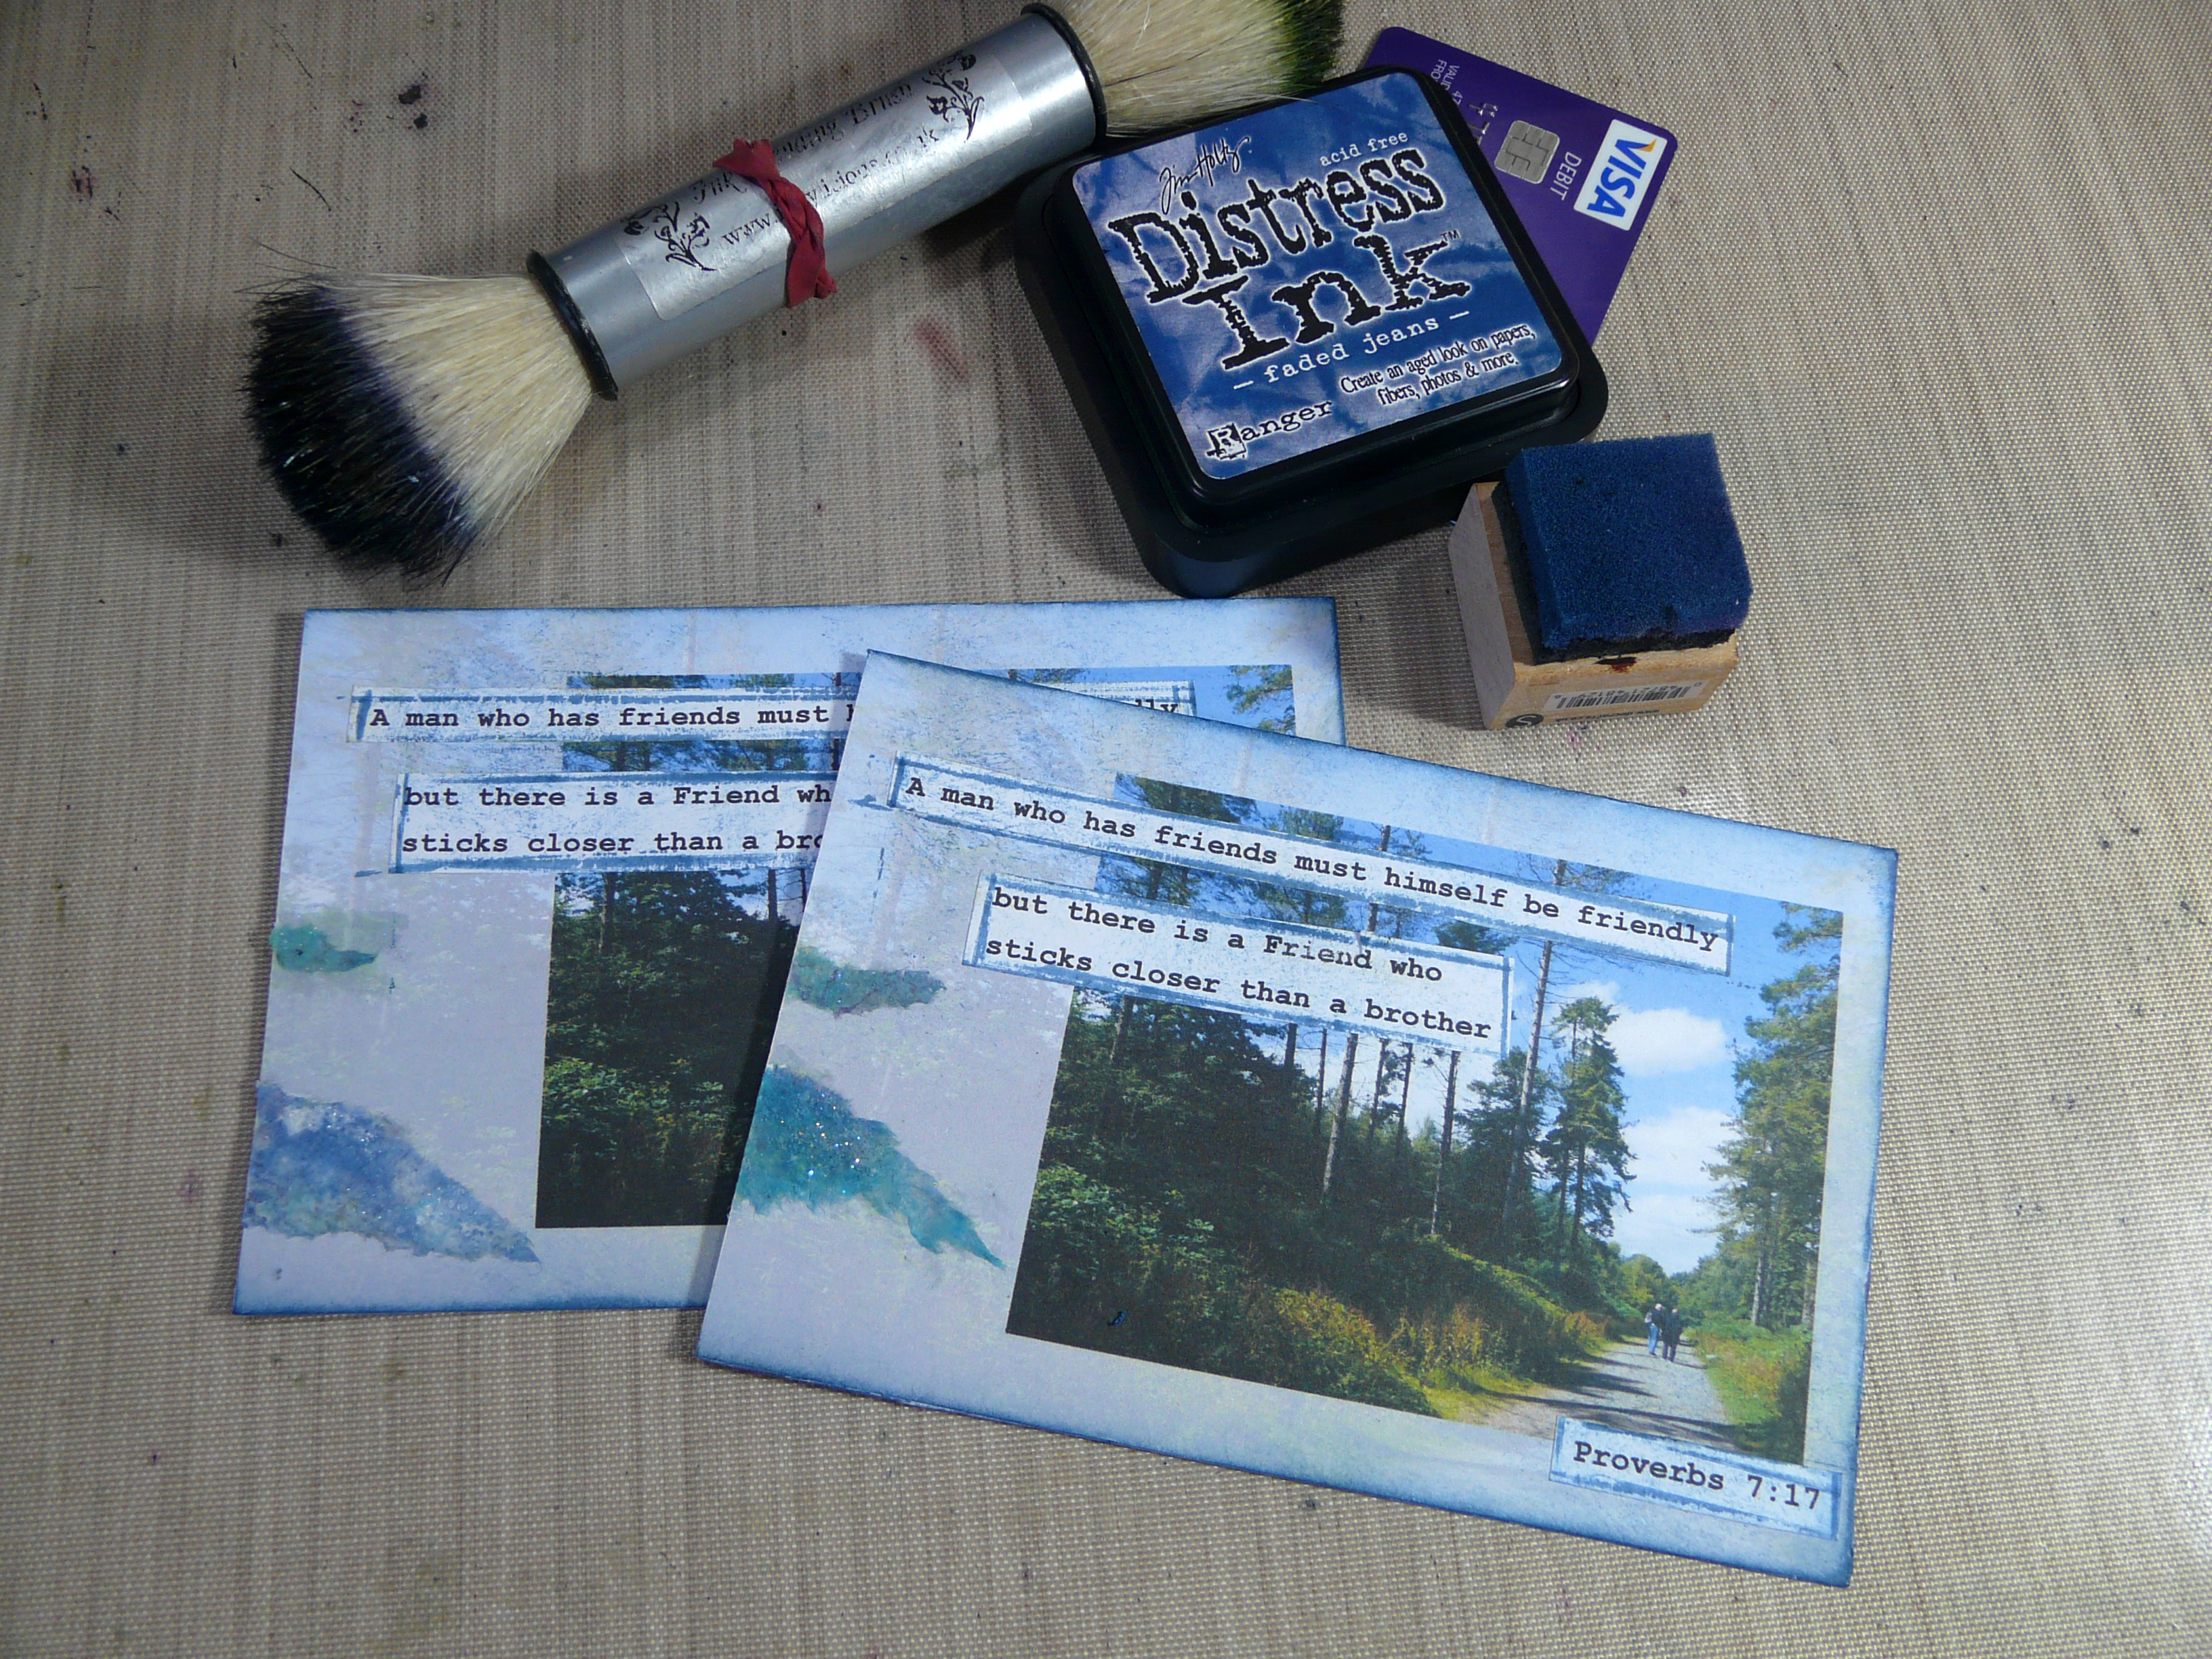
Here is the completed page.

On the left-hand page, I used my white marker pen to add text between the strips of inked kitchen paper.

Here’s a detail shot.

The page pairs. See how the kitchen paper extends onto the right-hand page.

Detail of the pages.

Walk in the Woods Pages
All I needed to do for this was to add some text to the background page that I’d created using black Infusions applied with a fan brush.

The left-hand page.

Queen Beech Pages
This is a quote I made up myself. I have always adored beech trees and consider the beech to be the queen of the wood.
I added text using a permanent black pen outlined with the white marker pen, and distressed the edges using a home-made blending tool.

Detail.

The left-hand page.

Where E’er You Walk Pages
This is one of my favourite songs, from Handel’s opera “Semele.” I discovered online that the words were written by Alexander Pope.
All through our walk in the woods, I had that song running through my head, so I knew I had to include it somewhere in the album. I created the two photographic pages using a faded-out background that is actually a mirror image of itself on the two pages. I added the text with a permanent black pen.

Detail of the text.

The left-hand page.

Seeing Beauty Pages
I paired the two photos I took of beautiful small objects – a butterfly and a fir cone. So often people walk by and never notice the small things, but I’ve always had an eye for them and love the perfection of small natural forms.
I added some of the leaves I’d made, using Pinflair glue, after distressing the edges of the pages, using a home-made blending tool. The text was done as before, with the black and white pens.

The paired pages.

The right-hand page.

Yellow Flowers Pages
The yellow flowers page, with the linear-fade photo, had been a problem because I wasn’t sure I really liked it and didn’t know quite how it would fit in. I paired it with my fern tracing page, and with the addition of some of the leaves and flowers, I suddenly liked it – a lot! Again, I attached the leaves and flowers with Pinflair glue.

Detail.

The left-hand page.

Sea Pages
I tore the edges of the sea view photo to reduce the size somewhat, and to soften the effect. I distressed the torn edges with Faded Jeans distress ink. I applied both photos using soft matte gel medium onto a background of some printed cloud paper that I’ve had hanging around for years. I added more of my glittery blue inked kitchen paper to these pages, again using gel medium, and added some text with the black pen. To make it a bit more sparkly I applied some glitter pens in three colours, and Stickles glitter glue in two colours. I had intended to distress the edges but forgot to do this until after I’d applied the stickles, so this will have to wait until the pages are dry.
The paired pages.


The left-hand page.

The right-hand page.

It’s a bit difficult to see the sparkliness of these pages. I have added some fine lines of silver glitter pen to the surface of the sea and elsewhere, adding some glitter pen in two shades of blue.
Finally, here are all the pages I worked on today, with the exception of the Strong Tower page. The curled up text page on the left is now under some heavy books which I hope will deal with that!

It’s really coming together now, and I am so looking forward to completing it and giving a copy to our lovely friends who introduced us to this stunningly beautiful woodland.

Wow, you sure have been busy! So many beautful cards, thanks for sharing!
ReplyDeleteWish you a wonderful 2017 and most important - good health!
Hugs
Gabriele 29
Beautiful, beautiful pages. They are such an inspiration. I love taking walks in the woods and taking pictures. You inspire me to want to do something different with my pictures. That is my goal for 2017. I want to incorporate photography into some sort of art. Thanks for sharing!
ReplyDeleteLove how you paired up the pages, each with its own theme and how the design ties them together. It's a big commitment to make two of everything, but I know your friends will appreciate this lovely gesture. The binding is always so satisfying, like putting the cherry on the cake. Enjoy your New Year's Eve, Shoshi and best wishes for 2017! xx
ReplyDelete