Recently I found a video on Youtube with a number of pop-up designs for Valentine’s and I thought it would be fun to make one for my hubby. This time last year I was in hospital for Valentine’s and didn’t make him one, but he gave me the biggest one I’ve ever seen, and all the hospital staff thought it was brilliant!
Anyway, this year, I’ve managed to escape being in hospital for Valentine’s although I am waiting to go in, so there’s no excuse for not making one for him this time!
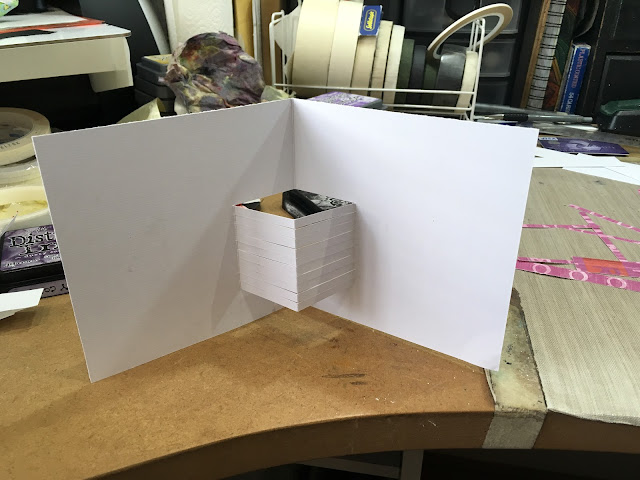
I began by making the simple pop-up mechanism from white cardstock.
This is the outside of the pop-up, folded. You can see some of the construction lines.
I thought I would use some of the scraps from my mystery project for this card. Here they are, being smooshed with Fired Brick Distress Ink. This particular paper is an absolute pain to ink because it seems to have rather a waxy surface that resists liquid, and it takes ages to dry with the heat gun, too, but it’s a paper stack I’ve had from the very beginning, and I’ve never liked it much, so I thought it was high time I used it up, especially that nowadays I’ve got enough experience to know how to improve it.
For the pop-up piece, rather than leaving it stark white, I smooshed it with Worn Lipstick Distress Oxide to give a marbled effect.
After this I distressed the edges with Vintage Photo Distress Ink – I thought that a touch of brown would prevent the card from looking too girlie.
I also distressed the sides of the pop-up, masking off the surrounding areas with some scrap paper.
Then I took one of the inked scrap pieces and cut it into half-inch strips, which I wove in and out of the pop-up to create the basket.
When the weaving was finished, I trimmed off the bottoms of the strips, and left the tops at random lengths.
I have only got one heart punch, and it makes very small ones. I punched out quite a few from one of the scrap pieces, punching them as evenly as possible so that I could use the waste piece to embellish the front of the card. Then I made some intermediate and larger hearts, drawing round a little template I made and then fussy cutting them.
I also cut some hearts from some scrap gold card to mat the hearts, and also added stickles (gold and orange peel) to some of the hearts, and began to glue them onto the pop-up with Scotch Quick Dry Adhesive.
I punched the corners of the pop-up with my multi-shaper punch. It’s not designed as a corner punch, but with some careful lining up, I was able to achieve the result I wanted. I also distressed these punched corners with Vintage Photo Distress Ink to match the rest of the pop-up.
At this point I forgot to take any photos for a while. I mounted the pop-up on some pink cardstock, and on the outside, front and back, I added some red cardstock that I distressed around the edges with Vintage Photo Distress Ink, and I also added some of this ink in the centre with an Inkylicious Ink Duster. I layered a heart cut from a scrap onto more of the scrap gold card, and this embellishment was mounted in the centre of the card with a large foam pad.
I attached the punched heart strip onto a piece of gold card using Scotch Quick Dry Adhesive, and then applied the whole embellishment to the red mat with double-sided tape, folding the excess punched layer around the back, before matting the whole thing onto the pink card base.
Here is the completed pop-up, with cut and punched hearts on the woven strips and also stuck down onto the back of the pop-up to give a dimensional effect. I hand-wrote the sentiment.
Finally, the completed card with the envelope I made from more of the pink cardstock, using my envelope punch board.
The edges of the envelope were distressed with Vintage Photo Distress Ink.


No comments:
Post a Comment
Thank you for your comments! They are much appreciated. Spammers, please be aware that I read and moderate ALL comments, and yours will be deleted before publication, so please don't bother!