Showing posts with label Brads. Show all posts

Friday, 5 October 2018

Box for Floral Mini-Album–Completing the Construction

Today I finished making the two boxes, with the exception of the embellishments for the top, and sorting one or two problems.

I began today’s session by cutting the pieces for the front mats.

40 Preparing the Front Mat

I had to sleep on it to work out how to get the hole for the clasp in exactly the right place. In the end, I added some Zig 2-way glue on the back and let it dry so it was tacky (temporary adhesive) and lined it up on the box and pressed it into place. Taking my pokey tool, I pierced holes through the mat from inside the box where I’d already made holes, for the brads to attach the clasp.

I then removed the mat. I laid the clasp on top of the mat and lined up its holes with those I’d just pierced, and drew round the clasp. I added 1/4 inch all around and then cut the piece out. I double-distressed all the edges (including the edges of the cut hole) with Vintage Photo and Black Soot Distress Inks.

I attached the clasps to the front of the boxes, filling the concave back surface of them with Pinflair gel glue as I’d done for the other part of the clasp, and attached them firmly to the box with the same antique brass coloured brads.

41 The Clasps on the Front of the Boxes

Now I was ready to attach the front mats, and it was easy to line them up over the clasps and glue them into place.

42 The Front Mats Attached

The lids laid in place, so that I could test that the clasps worked correctly.

42 The Lids in Place

I cut the two mats for the backs of the boxes and double-distressed them as before.

43 Inking the Back Mats

The back mats glued in place. I didn’t realise till later that I’d made a mistake here.

44 The Back Mats in Place

Double-distressing the side mats.

45 Inking the Side Mats

The side mats glued in place.

46 The Side Mats in Place

It was now that I realised my mistake – I should not have glued the back mats in place until the hinges had first been glued down, because the mats cover the construction strips.

47 My First Mistake

Fortunately it was easy to remedy. When I was making the Floral Mini-Album I learnt on Youtube that if you glue something with double-sided tape and have made a mistake, all is not lost, because you can soften the glue by heating it with a heat gun, and peel it back. This is what I did here.

Here is the lid in place, with its Tyvek hinge concealed by the re-attached back mat.

48 Hinge in Place

Using the cut out piece from the front mat as a pattern, I cut two pieces from an offcut from the front mat and glued them in place inside the box, over the three brads attaching the clasp to the front of the box.

49 Covering the Brads Inside the Front

Using a 1-inch punch and cutting from the same offcut, I attached circular pieces over the brads inside the lid flap.

50 Covering the Brads Inside the Lid

The brads are now all covered, giving a neater finish, and preventing anything catching on them. I used wet glue to attach them.

I decided after all that I would use the metal corners I’d bought. They are only joined on one edge; there is a gap in the other so that you’ve got a bit of flexibility for lining them up. I cut along one of the other two edges so that a flat piece was detached, and filed it smooth, and gently bent it back into shape with pliers.

51 Cutting the Metal Corners

I did this because if I had put complete corners on the back, the lid would not have opened. I put the flat piece of the corner that I had cut off onto the back of the box, and the remaining piece around the corner of the lid.

I had a bit of trouble with this and it was hard to make them stick, even with hot glue. Opening the box, the two metal pieces collided and tended to knock each other off, so I had to heat it up and move them a bit so that there was a gap. I’m not sure I’m 100 percent satisfied with the result just yet.

Also, opening the box, the inside of the Tyvek hinge is visible, and it’s white. I don’t think the attachment of the Tyvek is strong enough as it’s tending to peel away. I propose adding another strip inside. This will be visible unless I ink it to match the box. I may also have to add a couple of ribbons to prevent the lid opening too far.

I added the metal feet, using hot glue.

Anyway, for now, apart from these final minor problems to sort out, the boxes are complete. Here they are with all the metal embellishments in place.

52 All the Metal Embellishments in Place

I have sorted out some remaining flowers from the Floral Mini Album project, and I need to make some more leaves, because these were all used on the album. I shall also die-cut some more gold Moroccan trellis and possibly some other embellishments. These will all go on the top of the boxes, and then the project will be complete. I have just under a week to do it, so I’m not panicking… Yet!

Thursday, 4 October 2018

Box for Floral Mini-Album–Lid Construction

Today I finished constructing the lids for the two boxes.

After mulling over whether to leave the insides of the lid flaps plain black or whether to try to match the inside of the box, I decided in the end not to be lazy but to refer back to my previous post on the subject and try to replicate the same appearance. Of course, I’d used up all the table napkin fragments, but these flaps are so narrow that they didn’t really need them. I am glad I took the trouble to do this because it will give a better finish in the long run.

33 The Lid Pieces Inked to Match Box Inside

On the right in the above photo, you can see one of the clasps lined up against the pattern I made for the front flap mat. This was trimmed down from the original pattern for the front flap. From the outset, I wanted the mats to be trimmed away from the clasp pieces so they would have a nice black border, as there would be around the edges.

Here are the front flaps with the clasps attached. I used small antique brass coloured brads, and also a fairly thick layer of Pinflair gel glue to fill the concave back of the clasp, to ensure that it remains firmly in place.

34 Lid Front Flaps with Clasps

I cut all the mat pieces for the lids – the tops, the side flaps and the front flaps, and double-distressed them with Vintage Photo, and then Black Soot Distress Inks.

35 Distressing the Edges of the Lid Mats

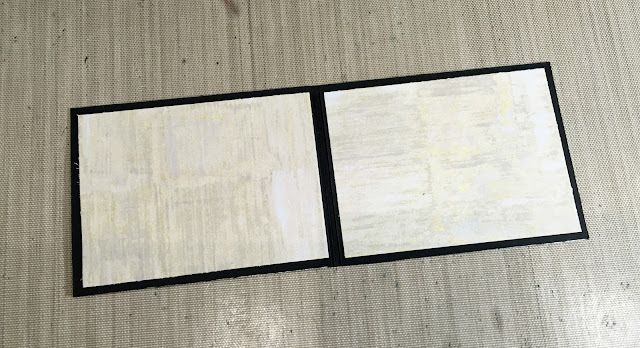
After assembling the boxes, I added the mats to each piece. These covered the construction strips, leaving just a 1/8 inch border all round.

36 The Lids Assembled

I cut a similar mat for the bottom of each box, this time from plain black cardstock, and stuck them down. All the mats were stuck with a combination of double sided tape and glue stick.

37 Black Mats on Box Bottoms

I put the lid in place on the box and lined up the second part of the clasp so that it was engaged with the first part (already attached to the lid front flap). Holding it in place, I marked the position of the three holes on the front of the box, for securing the clasp piece. After this, I painted the area with black acrylic paint, because again, a small border of black will be showing around the clasp when I cut the shape from the box front mat.

38 Piercing and Painting the Box Fronts

The boxes so far.

39 The Boxes So Far

I have not yet attached the lids. I made the hinges from 1-inch wide strips of Tyvek painted with black acrylic paint and they will be attached with double-sided tape as before.

All that remains to finish the basic boxes is to cut and stick the mats for the front, back and sides of the box. I also want to cut small pieces of card (offcuts from the lid mats as they are a reasonable match) to glue over the backs of the brads on the inside of the box and lid, to give a better finish and to prevent them catching.

Once the construction is completed, I shall add some embellishments to the tops of the boxes, and also the metal feet that I bought on Ebay.

Saturday, 14 April 2018

Floral Mini-Album Pt 9 Page 7

Recently I made a new mini-album, about my mum who died in December. I was unable to publish anything about this until now because it is a present for her best friend, who sometimes visits my blog, and I wanted it to be a surprise for her. I wrote a series of blog posts as I did each stage of the project, so I didn’t forget what I did, and they will be published in sequence now the project is finished and has been given to our friend.

If you want to see the finished project, please click here.

During this couple of sessions, I worked on page 7, which is predominantly turquoise and green to co-ordinate with page 6.

I had made the page with a simple, full-width pocket across the bottom. I began by matting the two sections, using paper from the stack, distressed with Forest Moss Distress Ink, and then created a flap, also matted and layered in the same way, and attached with a tab inside the cavity between pages 7 and 8. The piece of printed card I used for matting this had a touch of purple in it which I intended to bring out later on the page.

In the first photo you can see the flap closed, together with two small strips ready for making a retaining strap for the flap.


The flap open.

The materials for making the retaining strap, in this photo for both copies of the album. The white flower pieces and the small leaves were from my stash – these had been cut with my cutting machine, and in the case of the flowers, had not yet been coloured.

Colouring the flower pieces with Distress Stains – first of all I smeared a little of the Seedless Preserves on my craft sheet and spritzed some water beside it, and mixed it with a brush. I smooshed the flowers through this, and then dried them with my heat gun. To prevent these small pieces from blowing away, I held them down with a wooden skewer.

When they were dry, I mixed up a small quantity of Dusty Concord Distress Stain in the same way, and painted the tips of the petals with this to darken them, and again dried them with my heat gun.

When they were dry, I hand-embossed them from the back, with a round embossing tool onto a piece of fun foam.

I pierced holes through the centres of the flowers and through the strap, and lastly through the pocket and the page, and attached everything together with a small brad through the centre of each flower.

The final step was to slip a leaf under each flower and attach it with hot glue.

This is the finished result.

There will be plenty more flowers or other embellishments on the page, and if these little flowers look a bit lost, I can always add more, but for now I’m happy with the result.

Just page 8 to do now, and then I can begin the serious business of making photo and journaling mats, tags and other bits and pieces, and then the embellishing! I can’t wait to start that.

I am also planning to make a mechanical waterfall mini inside the front cover, and a holder for a CD of Mum’s favourite music inside the back cover. There’s still plenty to think about.

Thursday, 12 April 2018

Floral Mini-Album Pt 8 Working on the Inside of Page 6

Recently I made a new mini-album, about my mum who died in December. I was unable to publish anything about this until now because it is a present for her best friend, who sometimes visits my blog, and I wanted it to be a surprise for her. I wrote a series of blog posts as I did each stage of the project, so I didn’t forget what I did, and they will be published in sequence now the project is finished and has been given to our friend.

If you want to see the finished project, please click here.

During the next couple of sessions, I worked on the innermost part of page 6, underneath the two large flaps that fold up and down respectively.

On the central section, I decided to make three flaps which would open, revealing photo mats or journaling spots.

For these I cut strips of black cardstock, and then made some more of the background paper as before, from the boring green paper in the stack, with the addition of Forest Moss Distress Ink, and Broken China Distress Oxide. I’ve now more or less used up this green card. These mats were stuck down onto the black strips. You can see that the top edge of black card extends further from the mat – this is a tab for attaching the flap to the page.

For the reverse, I took some cream cardstock and added Broken China and Peeled Paint Distress Oxides, smooshing the ink on my craft sheet and building up the layers until I was happy with it. I wanted this to be paler than the front, in case I wanted to write on it. In the above picture, you can see the three flaps, showing the fronts and the mats for the backs.

To create the mat for the central section of page 6, I took more of the cream cardstock and swiped vertical stripes of Distress Stains in Antique Linen and Old Paper, to mimic the background of the spotty paper used for the mat under the top flap. I am pleased with how this turned out. It’s quite subtle, and has a woodgrain look about it.

I distressed the edges with Forest Moss Distress Ink – as I have done with most of the elements on page 6.

Once the mats were attached to the backs of the small flaps, I attached them onto the back of the large mat with double-sided tape, using my Tim Holtz centring ruler to make sure I spaced them correctly.

Here are the flaps in the open position. I think the papers all co-ordinate very nicely – a combination of unaltered and altered papers from the stack, and backgrounds created from scratch to co-ordinate.

I haven’t yet decided what to do with that great blank space.

Here are pages 5 and 6 (one from each copy of the album, obviously, because page 6 is on the reverse of page 5) showing how much I’ve done so far.

Moving on to the bottom flap of page 6, I selected some of the turquoise printed paper from the stack, which like the green version, I felt needed further treatment.

I smooshed on Forest Moss Distress Ink and then did the same, using Peeled Paint Distress Oxide. The edges were distressed with Forest Moss Distress Ink.

Here is the mat in place.

I made a small envelope to attach to the bottom of this flap. Here is the piece cut and ready to be assembled, made from the plain cream cardstock. The pencil line across the middle indicates the position of the envelope liner, which you can see ready to cut from a scrap of paper from the stack – same pattern as the green, but in a different colour.

The envelope liner in place, trimmed to follow the shape of the flap.

Creating the back of the envelope, using the same technique that I used for the mat on the central section of page 6.

I distressed the edges of the envelope with Forest Moss Distress Ink.

The first brad attached to the flap of the envelope.

The inside of the envelope, showing how I have clipped off the ends of the back of the second brad attached to the inside of the envelope front, and protected them with a small strip of masking tape.

The front of the envelope, showing the two brads.

The envelope, open.

The envelope in place, showing the thread attachment around the two brads. It is tied onto the top brad so that it doesn’t get lost when the envelope is open.

Making the envelope insert. This was cut from a scrap of the same paper I used for the mat for the top flap of page 6, and distressed around the edges with Forest Moss Distress Ink.

The back of the envelope insert, prepared with Distress Stains as before, and distressed around the edges.

The envelope insert in place.

I had been waiting for a few days for a new punch to arrive, before I could complete the little booklet to go under the magnetic strap on the top flap of page 6. This punch is the Floral Doily Border Punch from XCut. I wanted a border punch with a small pattern repeat for projects like this.

I made a mat for a piece of the altered green paper, using black cardstock, and punched around it with this new punch. This turned out to be a major pain to do, with lots of trial runs!

The punch removes 1/16 in from the edge of the card. I worked out that I had to cut the mat 3/4 in larger than the top layer in order to make it fit correctly, i.e. 3/8 in on each edge. I also discovered, from my first attempts with pieces that turned out too small, that it is virtually impossible to centre a very small piece of card in this punch, if the edges do not extend beyond the central part, onto the gauge you use to line it up. I tried attaching it temporarily to another piece of paper with a spot of glue stick but this wouldn’t punch properly as it was too thick. In the end, cutting the piece large enough to fit the top layer, it extended just far enough for me to see the edges, enabling me to punch it in the centre and work outwards. The excess at the edges of each punching (part-scallops), I trimmed away with fine scissors.

The inside of the booklet, using more of the beige card from the stack. I didn’t alter this in any way, although on second thoughts I could have distressed the edges.

The back of the booklet, using unaltered green paper from the stack, distressed around the edges.

The booklet in place under the magnetic strap on the top flap of page 6. Unfortunately this tends to fall out. It may be better when it’s a bit thicker with photos etc. but I may have to think of a way to keep it in place. (Note added later: it continued to fall out constantly, but the addition of some carefully placed embellishments sorted the problem – see later post.)

This completes the work on page 6 to date. I am pleased with its colour scheme, with the altered background paper and the use of Distress Oxides. These are definitely a good investment and a great addition to my stash!

Related Posts Plugin for WordPress, Blogger...