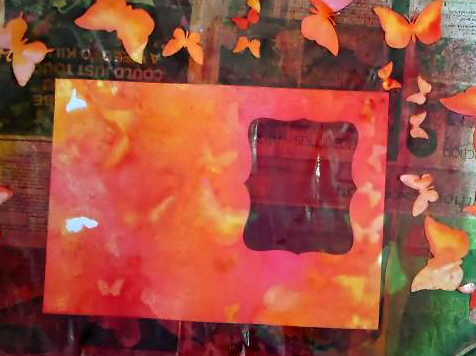
I love this technique. I invented it myself (although of course others might also have done so, but I haven’t seen it done before!). It kills two birds with one stone – back in July 2012 when I first got my Dylusions spray inks, I cut a lot of flower pieces that I wanted to colour, and laid them down on a piece of card, and sprayed the inks. The pieces acted as masks. I then removed the pieces, which left white, unsprayed shapes where they had been, and replaced them the other way up, in different places on the background piece, and re-sprayed it. What I ended up with was a collection of pieces coloured on both sides in a gorgeous random fashion, and a great background with flower shapes, also in different random colours. (There are several posts about this in the July 2012 subfolder of this blog.)
I employed the technique again recently, as part of the Floating Butterflies card I made for a friend’s birthday, using the butterfly shapes I’d cut with Sheba (the name I have given to my Cougar cutting machine), and used the card base (also cut with Sheba) complete with its aperture, as the background piece, and then repeated the process so that the inside of the card was sprayed with random butterfly shapes too. I will soon be doing a couple of blog posts about making this card. I haven’t been able to upload these until now because I didn’t see my friend until yesterday, when I gave her the card, and it was under wraps till then!
This time I didn’t use watercolour paper, but cut the shapes from white American Cardstock 12 x 12 which is fabulous stuff to work with – it cuts like a dream on Sheba, and it seems to stand up very well to the amount of water you chuck at it with this technique. It’s also thinner than the watercolour paper I’ve got, and so it makes finer flowers, and it’s also less expensive! Watercolour paper is a bit of a pain to cut on Sheba because it seems rather dense and fibrous, but it cuts a lot better if you spritz it lightly with water once you’ve stuck it down on the cutting mat, and leave it for a few minutes to soak in. The American Cardstock is a lot more convenient all round, and is also available in the standard 12 x 12 size.
The next batch of photos are stills grabbed from the video I made, which will be on Youtube eventually, when I’ve had a chance to edit it.
The first one shows the beginning of the “mask and spray” technique.
Removing the butterflies after the first spraying, showing the white shapes underneath.
#Sometimes the ink is so wet that it creeps under the shapes but that doesn’t matter – it all goes to make the resulting background more random and undefined.
The next photo shows the butterflies being replaced in different places. The original white spaces will be sprayed with pure colour, and the already-sprayed background will get extra layers of colour, and the butterflies get their backs coloured in the process.
The piece being re-sprayed.
The butterflies removed again.
There were a few white spaces left, where I’d overlapped the butterfly pieces over original white bits, but these soon disappeared with further spraying.
In the past I’ve just done one spraying for either side of the butterflies, but in this case I did it more than once, till I got the result I wanted. Here are the butterflies being removed after the final spraying.
Some of the sprayed butterfly shapes. I love the variation in colour, and the fact that some look more textured than others.
The outside of the final background piece, which is the card base.
The inside of the card, duly masked and sprayed.
This is a very useful technique for producing nice random backgrounds and masterboards quite quickly and easily, and it also provides you with a good quantity of cut pieces (flowers, butterflies, etc.) to go in your stash to be used for other projects. It is also the most tremendous fun to do – really hands-on and messy and creative!


What a great technique in itself, but how neat to just do this when inspiration/motivation fails.You would end up with something gorgoeus even though you didn't start off feeling inspired.I often use Free Motion stitching for this reason too.Now.to go and find my inks, and die cuts!!
ReplyDeleteVery impressive backgrounds Shoshi, yet so simple! Just shows how a bit of foresight can be beneficial, instead of wasting those beautiful inks. My problem with Dylusions is still the fact that they are not permanent and lightfast. I truly developed a love-hate relationship with those sprays - or sprays of any kind for that matter! Except water misters - those are very useful to make paint run! I've never heard of the technique you described to mist the cardstock with water to make it easier to cut! Will have to try it for myself!
ReplyDeleteThank you so much for letting me know you'd posted about this - I love those colours you used, and it reminds me of a project I used to do with my students - we sponged over masks of fish, and then they coloured and decorated the fish with stripes, zigzags and spots etc - it looked fabulous in ceramic paint on dinner plates!
ReplyDeleteI'm sorry to hear you had an accident and are all bandaged up - it sounds nasty, I hope you recover quickly and can get back to arty crafting.
Diana x