
Panic stations! Suddenly remembered I hadn’t made a card for my hubby’s birthday at the end of this week, and I’ve got a very busy week ahead. I thought I’d better get my skates on.
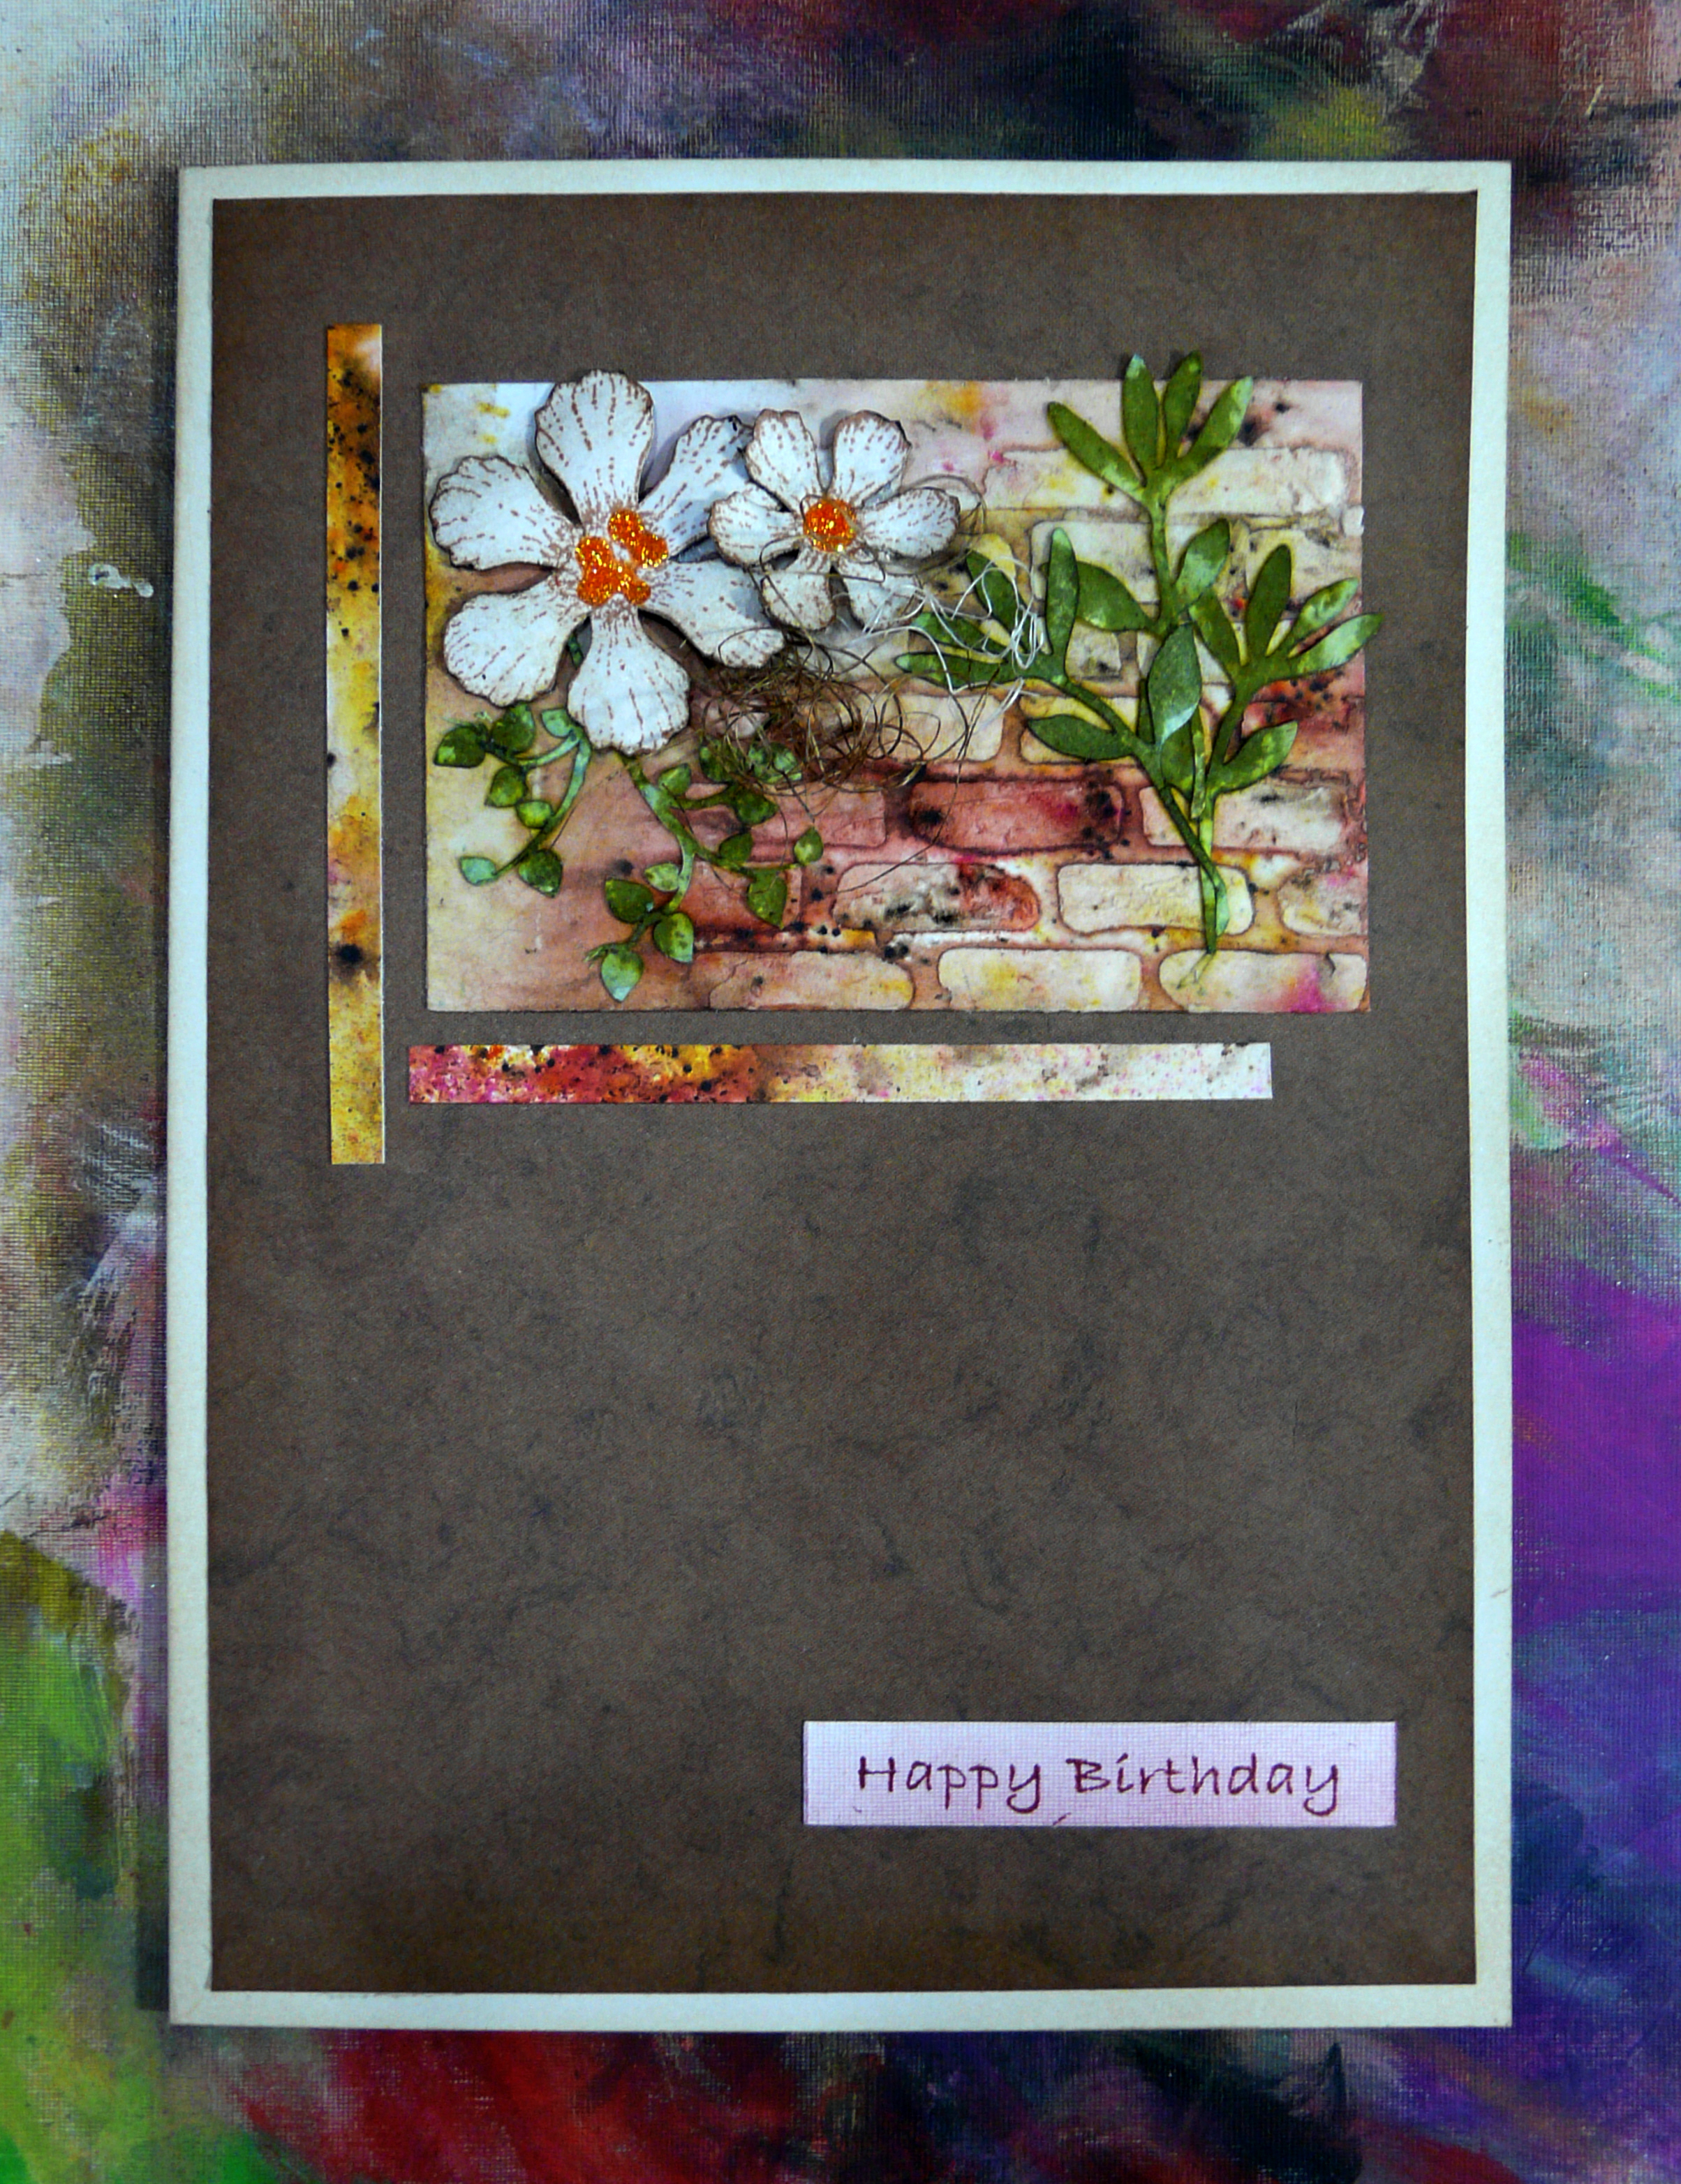
My Infusions mini-album, that I have been working on for the past few weeks, has generated quite a few reject pages, and some perfectly good ones which I decided on balance not to include. These are still hanging around on my workdesk and will eventually find their way into my stash for future use, and I chose one today that I thought might make a nice card – it was one of the ones I made with Polyfilla through my own brick stencil, as I only needed one for the album.

I have a few tiny scraps left from my Infusions mask and spray 12 x 12 sheets that I made last year, most of which were used up on the Mamhead mini-album for the end-papers and cover. I have a few of the flowers and leaves left, and also a few of the Heartfelt Creations stamp/die cut combos I made some time ago, so rootling around in that little lot, I came up with enough materials to put together quite a nice card.
I began by looking out the pack of jute fibre I bought from Ebay ages ago. This is very fine and wasn’t quite what I wanted when it first arrived, but I thought with a bit of persuasion I could coil it up and make it do more what I wanted! Being a natural fibre, it absorbs ink pretty well, so I began by colouring a few strands, using Distress Stains in Walnut Stain and Vintage photo. I stuck the ends together with Scotch Quick Dry adhesive to make the whole thing a bit more manageable.

Once they were coloured, I wrapped them around the handle of a fat paintbrush and spritzed them with water. I held them there for a few minutes and gently dried them with my heat gun – a bit like setting hair!

When I pulled them off, they looked like this:

I was quite pleased that they had held their shape so well. All that was required was to tease them out a bit, ready for use.

I stuck the bundle onto the card with a little strip of masking tape.

I selected two of the Heartfelt Creations flowers which I’d already hand-embossed, and stuck them down onto the card with Pinflair gel glue, covering up the masking tape on the jute fibres.

I had cut a few leaf trails for the Mamhead album and I coloured these with two Distress stains, Forest Moss and Bundled Sage.


This gave a nice mottled effect which was a bit more natural-looking than a flat dark green.

I ended up needing another of the large ones, but this didn’t take long to do afterwards.
Assembling the piece.

I attached the leaf trails using soft matte gel medium, and added some Orange Peel Stickles (glitter glue) to the centres of the flowers. This was how it looked at this stage.

The Stickles and Pinflair glue take ages to dry, so I left the piece out overnight.
Next day it was dry, so I could complete the project. I folded a piece of white A4 card in half and inked the edges with Antique Linen Distress Ink – the white card was far too stark and bright. I found the last of some mottled brown card that I had in my stash which I’ve been anxious to use up, and cut it to size to mat and layer. The cut edges were very white so I inked those with Vintage Photo Distress Ink.

I also distressed the edges of the inside of the card with Antique Linen Distress Ink.
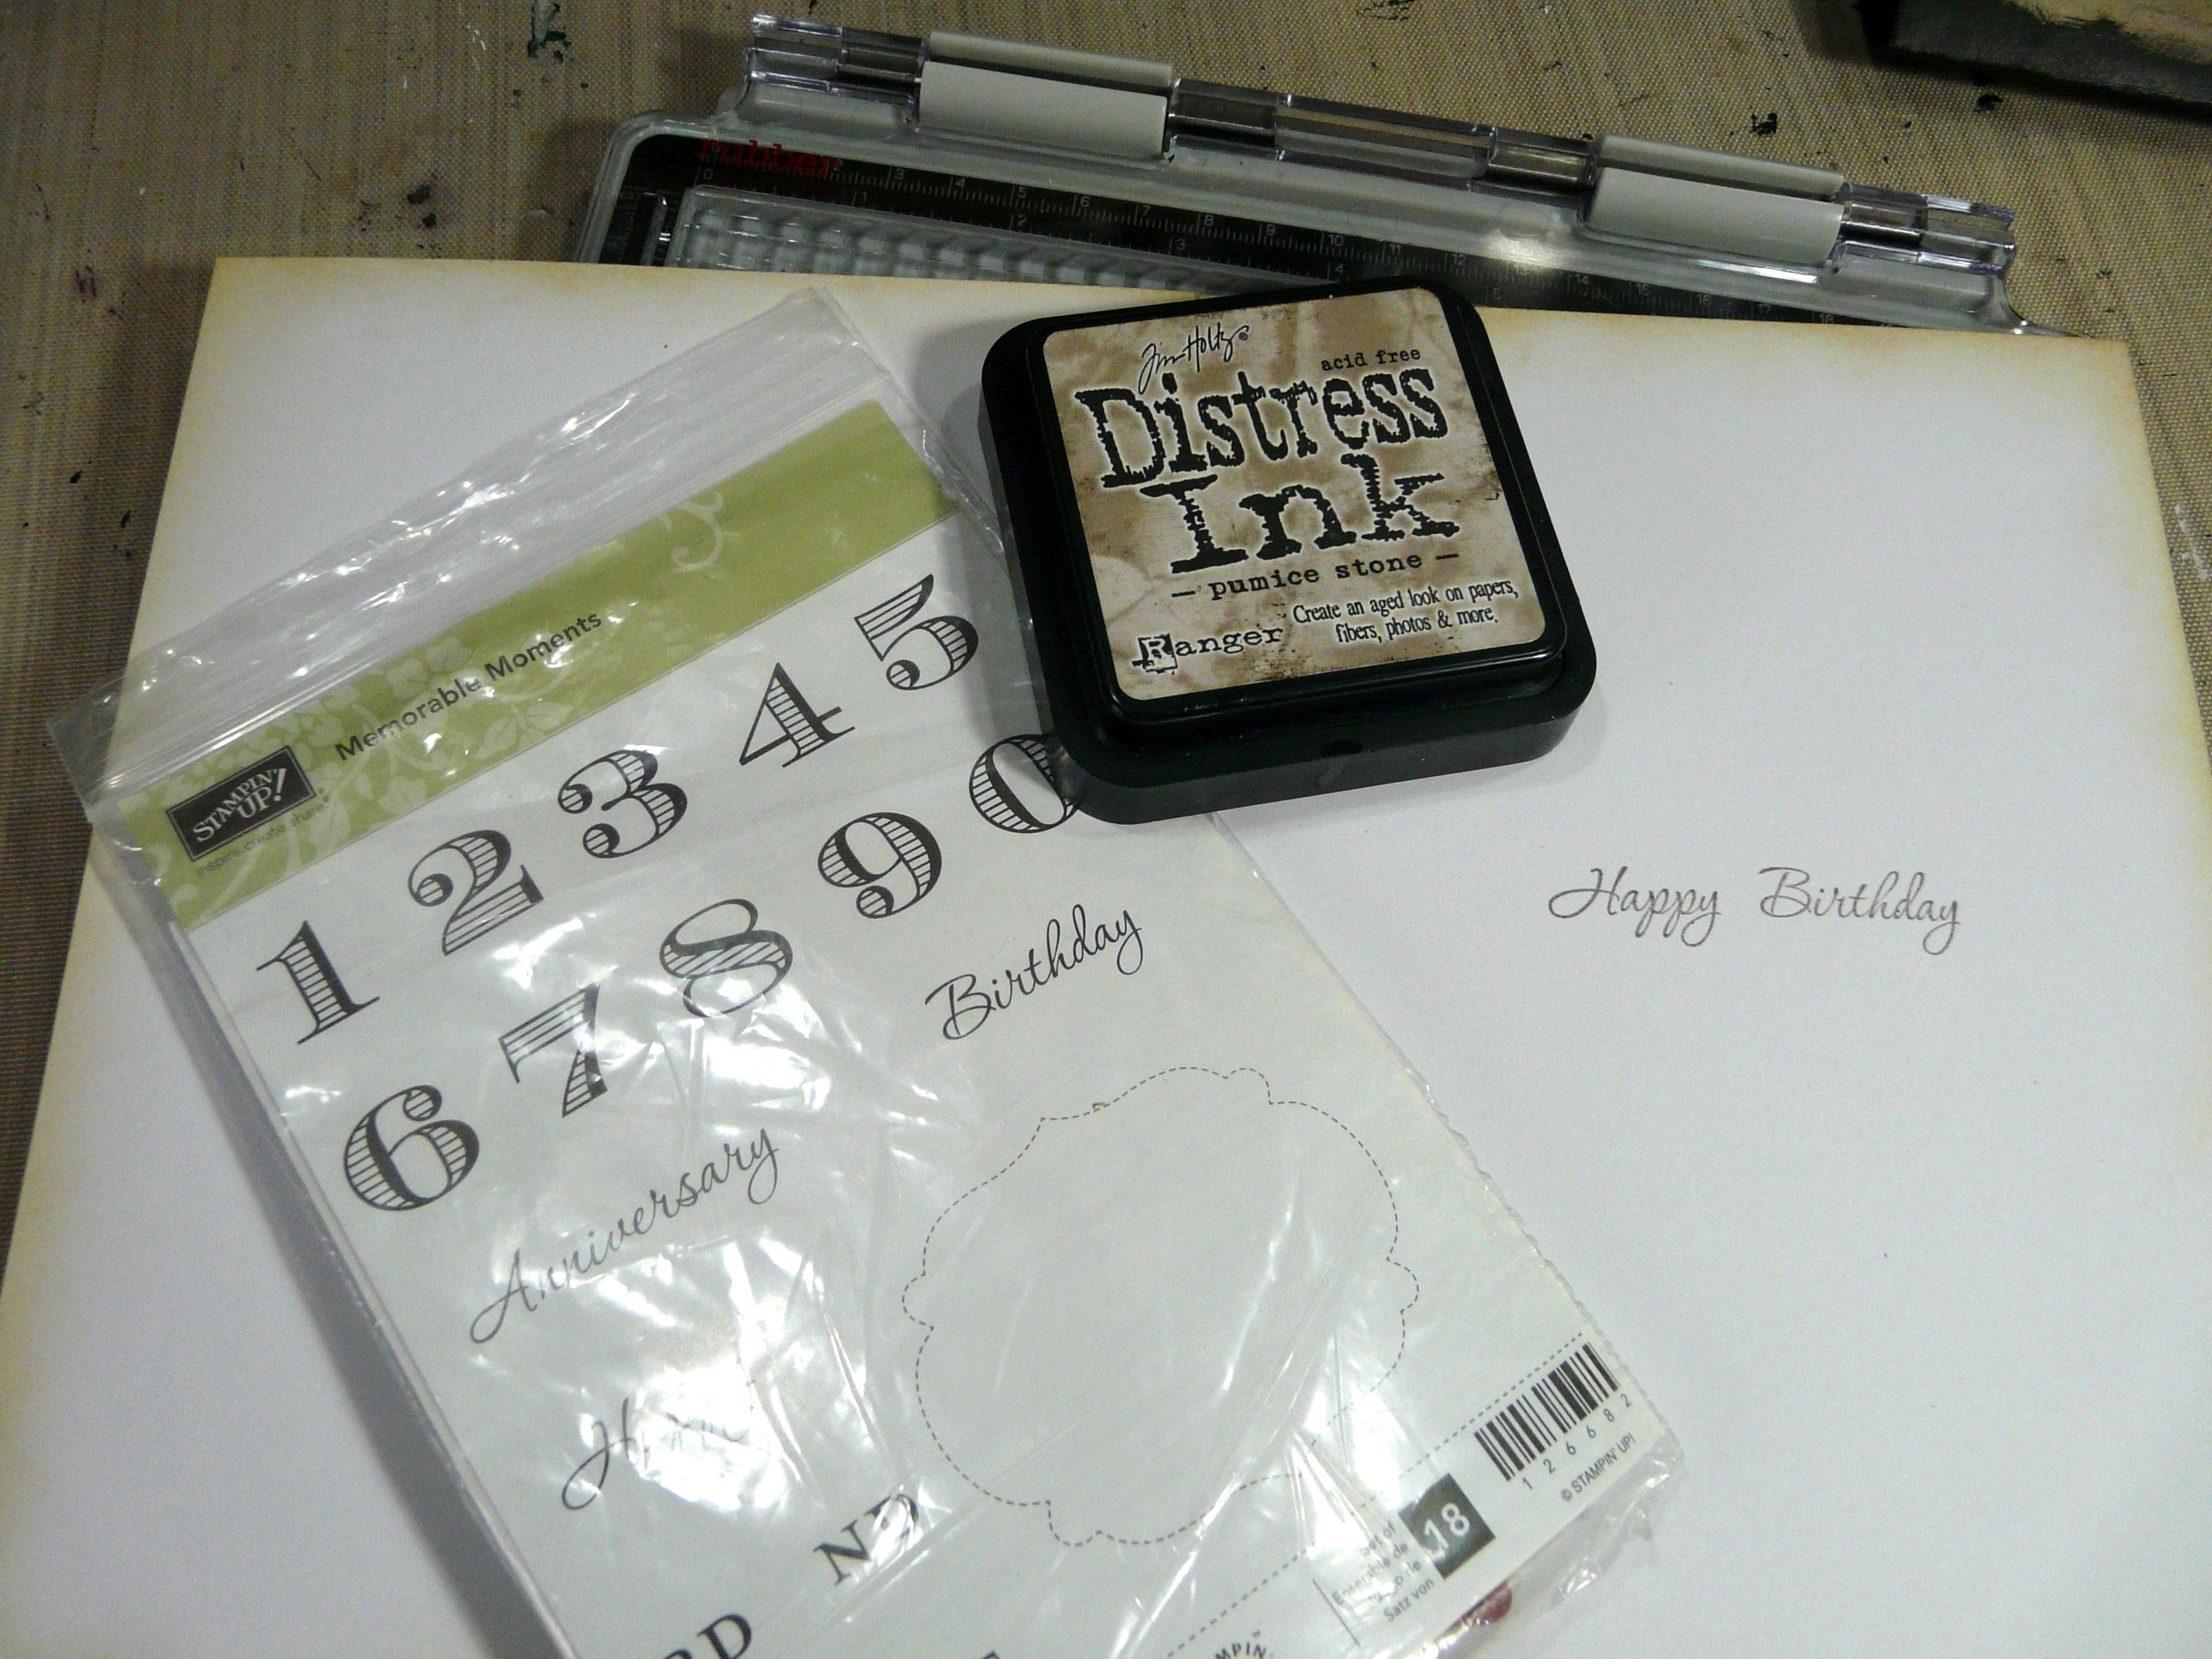
Time to use my wonderful new Tonic stamp platform for the sentiment inside! I tried it out the other day when I made my copper and sepia card. This time I used it side-to-side so I could put my card in. I did a few trial runs with scrap paper to make sure the stamps were correctly positioned.

The materials for stamping the sentiment. I used the Stampin’ Up “Memorable Moments” stamp set which is useful because you can mix and match the stamps. I used Pumice Stone Distress Ink, and as this is fairly pale, I stamped it three times. One of the great things about the stamp platform is the ability to stamp again in exactly the same place – very useful if you get an incomplete impression first time. I’ve never been that great at stamping, and I’m so glad I bought this new gadget!
I thought the inside of the card looked a bit bare, so I got out my bricks stencil and taped it in place, and used an Inkylicious Ink Duster and Antique Linen Distress Ink to create a bit of interest.

The finished result. The brickwork nicely echoes the theme of the front of the card.

The finished card.

The little strips forming a partial frame were in the box of scraps left from the Infusions 12 x 12 pages and I thought I might as well use them up! There’s not much left of that paper now. The Happy Birthday sentiment was in my stash – I think it was part of a pack of odds and ends I received as a gift from a friend some time ago.
A detail shot of the topper. My hubby loves his garden so I hope he will like this floral card. I don’t think it’s too girlie!

Phew! What a relief! Completed it in time!
He should love this!
ReplyDeleteA lovely card Shoshi! I love your brick stencil and thank you for sharing your process - I love to see how people have created their art... !
ReplyDelete