Showing posts with label Hand-made cards. Show all posts

Monday, 12 February 2018

Pop-Up Valentine Card for my Hubby

Recently I found a video on Youtube with a number of pop-up designs for Valentine’s and I thought it would be fun to make one for my hubby. This time last year I was in hospital for Valentine’s and didn’t make him one, but he gave me the biggest one I’ve ever seen, and all the hospital staff thought it was brilliant!

Anyway, this year, I’ve managed to escape being in hospital for Valentine’s although I am waiting to go in, so there’s no excuse for not making one for him this time!

I began by making the simple pop-up mechanism from white cardstock.

This is the outside of the pop-up, folded. You can see some of the construction lines.

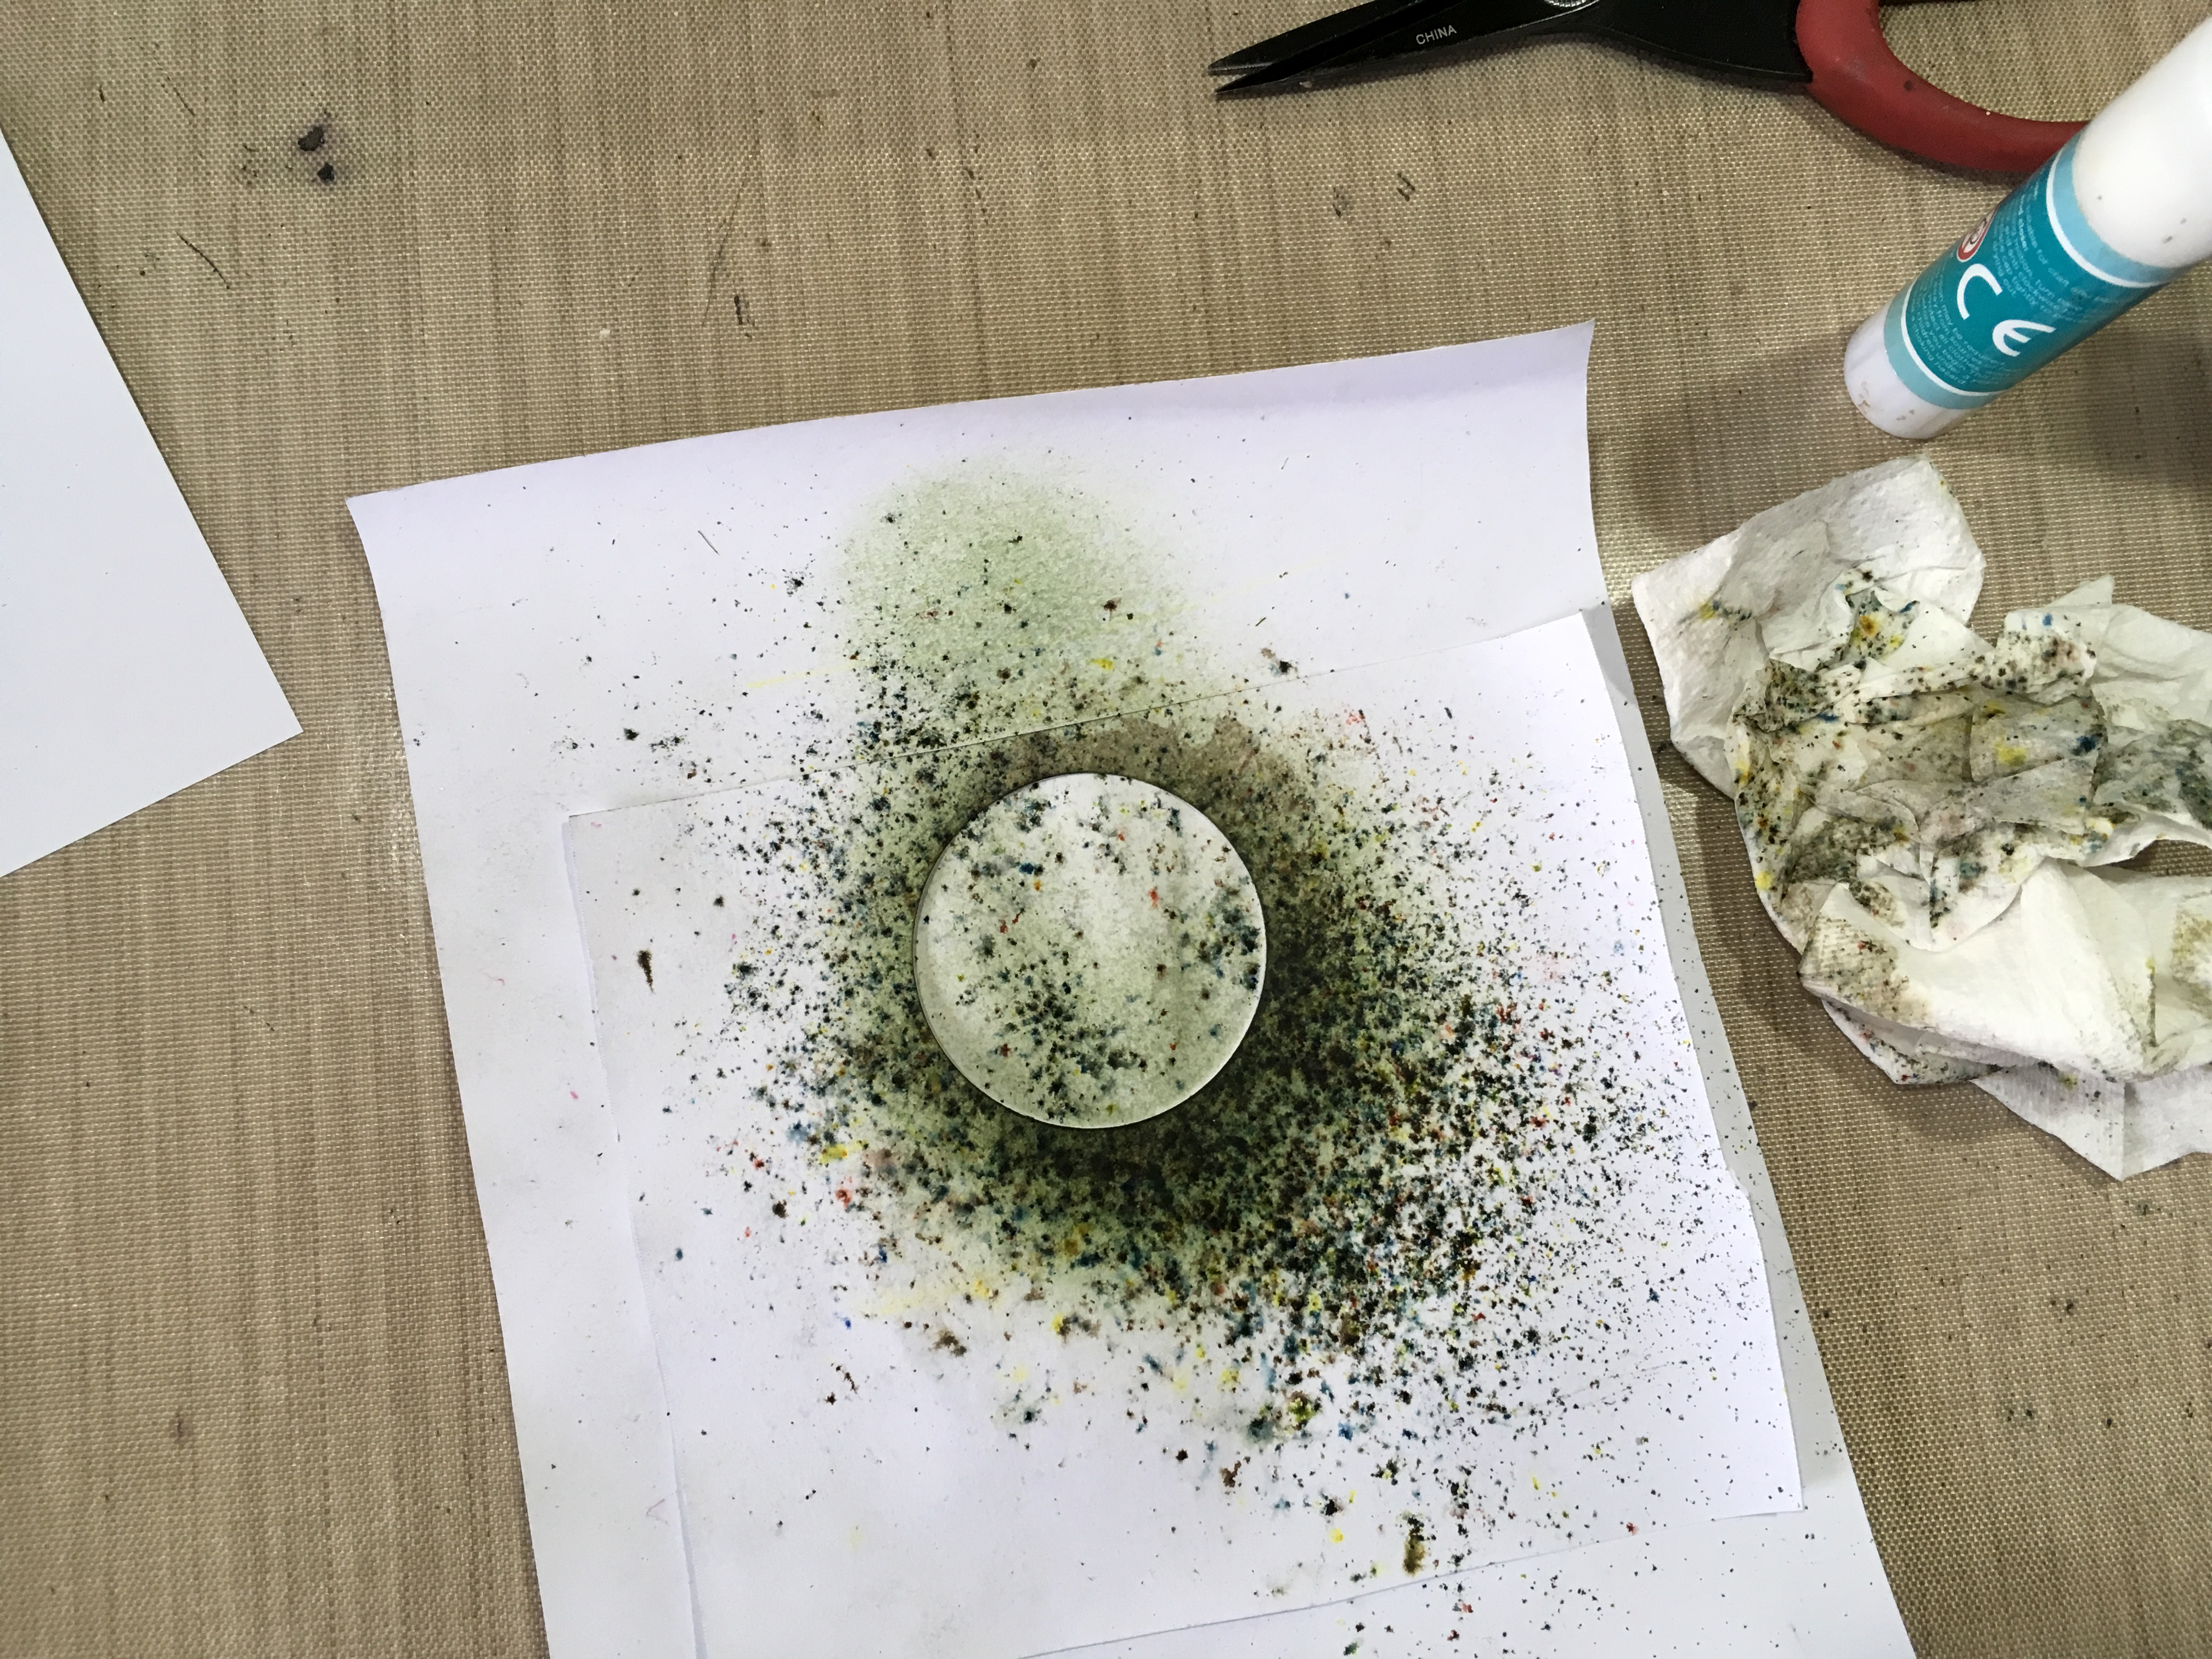
I thought I would use some of the scraps from my mystery project for this card. Here they are, being smooshed with Fired Brick Distress Ink. This particular paper is an absolute pain to ink because it seems to have rather a waxy surface that resists liquid, and it takes ages to dry with the heat gun, too, but it’s a paper stack I’ve had from the very beginning, and I’ve never liked it much, so I thought it was high time I used it up, especially that nowadays I’ve got enough experience to know how to improve it.

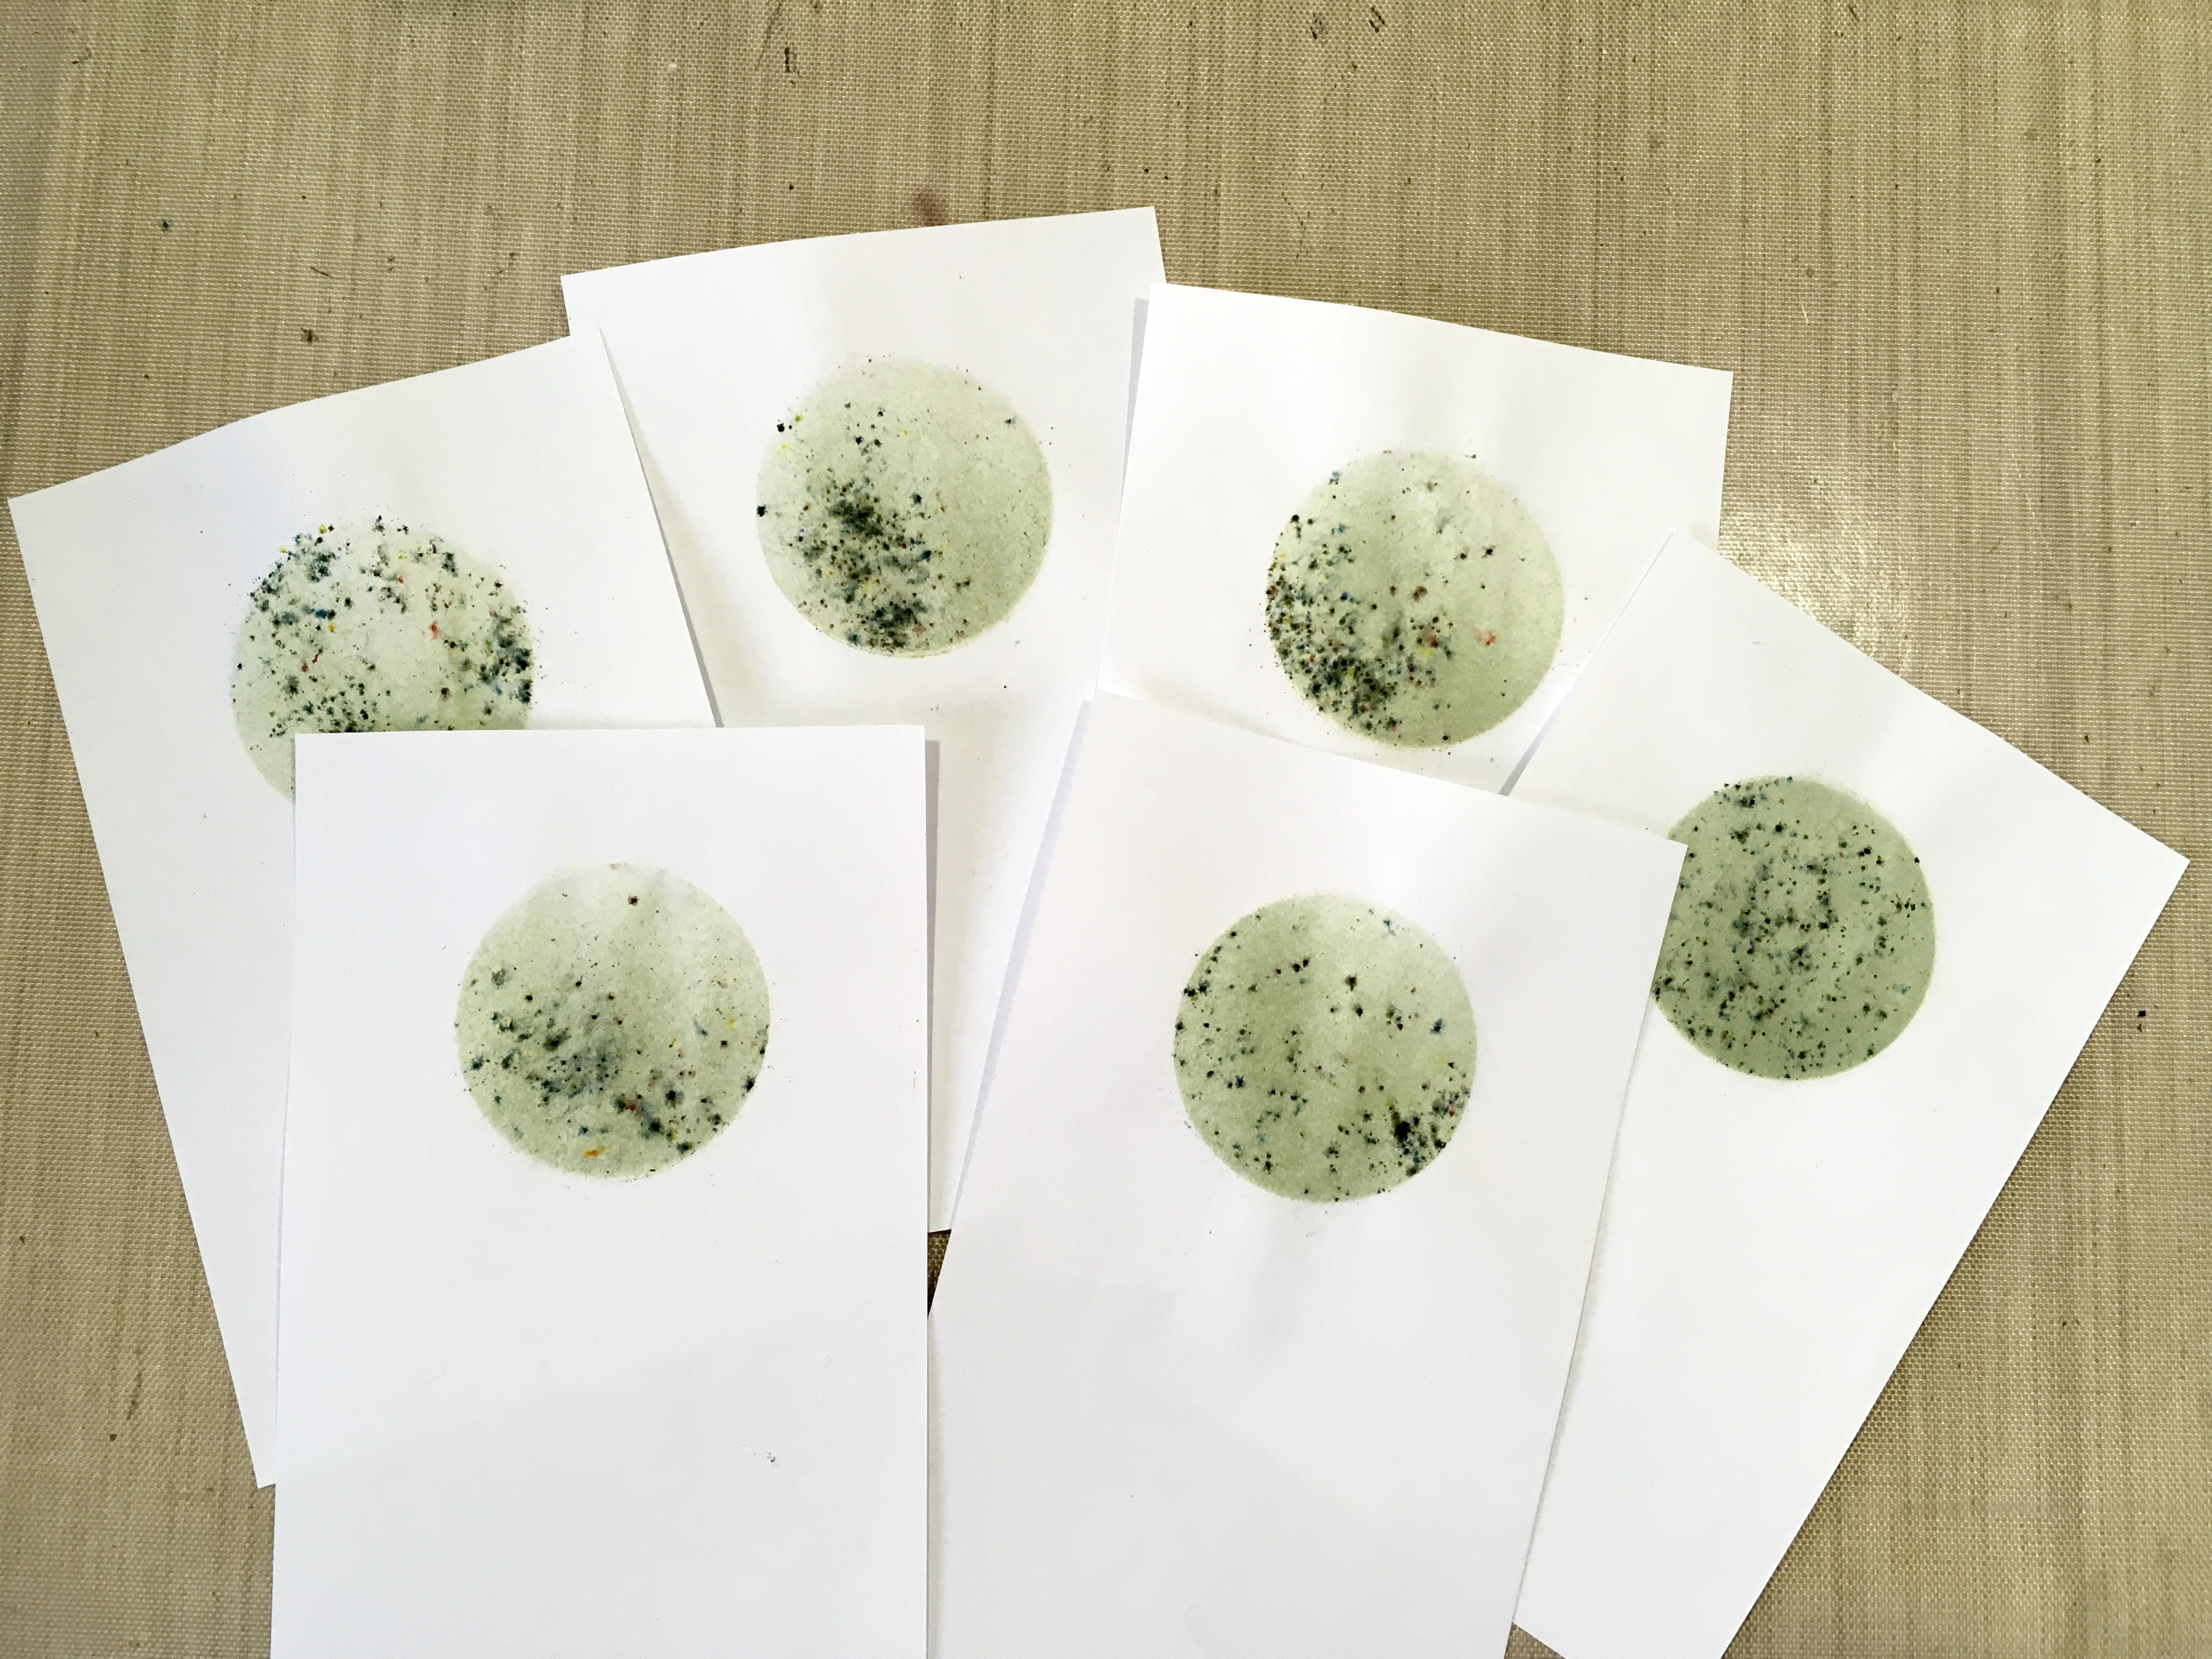
For the pop-up piece, rather than leaving it stark white, I smooshed it with Worn Lipstick Distress Oxide to give a marbled effect.

After this I distressed the edges with Vintage Photo Distress Ink – I thought that a touch of brown would prevent the card from looking too girlie.

I also distressed the sides of the pop-up, masking off the surrounding areas with some scrap paper.

Then I took one of the inked scrap pieces and cut it into half-inch strips, which I wove in and out of the pop-up to create the basket.

When the weaving was finished, I trimmed off the bottoms of the strips, and left the tops at random lengths.

I have only got one heart punch, and it makes very small ones. I punched out quite a few from one of the scrap pieces, punching them as evenly as possible so that I could use the waste piece to embellish the front of the card. Then I made some intermediate and larger hearts, drawing round a little template I made and then fussy cutting them.

I also cut some hearts from some scrap gold card to mat the hearts, and also added stickles (gold and orange peel) to some of the hearts, and began to glue them onto the pop-up with Scotch Quick Dry Adhesive.

I punched the corners of the pop-up with my multi-shaper punch. It’s not designed as a corner punch, but with some careful lining up, I was able to achieve the result I wanted. I also distressed these punched corners with Vintage Photo Distress Ink to match the rest of the pop-up.

At this point I forgot to take any photos for a while. I mounted the pop-up on some pink cardstock, and on the outside, front and back, I added some red cardstock that I distressed around the edges with Vintage Photo Distress Ink, and I also added some of this ink in the centre with an Inkylicious Ink Duster. I layered a heart cut from a scrap onto more of the scrap gold card, and this embellishment was mounted in the centre of the card with a large foam pad.

I attached the punched heart strip onto a piece of gold card using Scotch Quick Dry Adhesive, and then applied the whole embellishment to the red mat with double-sided tape, folding the excess punched layer around the back, before matting the whole thing onto the pink card base.

Here is the completed pop-up, with cut and punched hearts on the woven strips and also stuck down onto the back of the pop-up to give a dimensional effect. I hand-wrote the sentiment.

Finally, the completed card with the envelope I made from more of the pink cardstock, using my envelope punch board.

The edges of the envelope were distressed with Vintage Photo Distress Ink.

Monday, 16 October 2017

Card Factory 2017

My stash of cards had pretty well run out so I really had to get down to making some more. I’ve decided I don’t really enjoy card making that much, so it’s a bit of a chore but I haven’t quite got to the stage when I’ve given up altogether and resorted to buying them!

Rather than falling into my usual trap of turning each card into a major work of art and taking far too long over it, I kept these ones simple. I shall continue to make special cards when the occasion demands, but the limited time I have available to spend in the studio (dictated by busyness elsewhere, and being too fatigued to do anything) is now dedicated to art projects I actually want to do, such as mixed media, books, experimenting with materials, etc.

Today I made seven cards. Six were more or less identical and were on a production line basis, and the other was a one-off which I made for our neighbour whose birthday is today.

I really struggled with these! Such a simple project, but if anything could go wrong, it did… I was feeling a bit brainfogged which really doesn’t help, and I made quite a few mistakes which were not able to be remedied unless I started again, so I pressed on. As a result, they are not my best effort!

I began by making a circular mask. Rather than setting the cutting machine up (couldn’t be bothered – too tired!!), I cut a 2-inch circle with a punch, which of course had to cut quite near the edge of the paper, so I stuck this with a glue stick to a larger piece, out of which I had cut a rough circle, larger than the punched circle. This is the back of it.

Turning it over, it provided enough margin not to allow anything to stray beyond the edges.

I had a couple of abortive attempts. I sprinkled Infusions (The Sage from set 1) through the mask onto two of the sheets I’d cut for the card toppers. In order to get enough coverage, they came out much too dark to stamp on. The one on the right was slightly lighter, and I thought I’d run over it lightly with a wet brush to make the texture smoother, but this was a disaster. Bin time.

It was hard to know what order to post the photos in, because in order to photograph the process I went through, I had to get ahead of myself a bit – I used the first successful circle as a guide for the rest. Here it is on my light panel, ready to use as a guide.

I lined up the next sheet over it, and you can just see the circle showing through.

I was then able to lay the mask on top. I had to do it this way because the mask was bigger than the small sheet and I had no way of lining it up otherwise.

I’d decided the only way I could get the effect I wanted, with good coverage of colour but with a little of the Infusions texture, was to ink the circle first with distress ink using an Ink Duster (I used Bundled Sage), and then add the absolute minimum of Infusions on top. This worked well.

Here is the distress ink going on, through the mask.

I picked up the whole thing and without disturbing it, carried it back to my main work area and sprinkled on the Infusions through the mask.

I spritzed it lightly with water without moving the mask.

I left it to stand for a minute or two and then blotted it off.

Finally, I removed the mask and dried it with my heat gun.

Here are the finished circles.

The problem was, I should have cut these pieces from card, and not from paper. The paper didn’t stand up too well to getting wet, and it buckled a bit.

I got out a selection of stamps, to choose which designs I wanted to use.

Using my wonderful new stamp platform, I stamped a single image onto each circle, using black archival ink.

This flower head one didn’t have a stem – you could use one of the stem stamps from the set but it meant setting it up on the stamp platform, and I thought it would be simpler just to draw one in with a black marker pen afterwards.

I have always been hopeless at stamping. The stamp platform is a marvellous tool for someone like me, but would you believe it… Only Shoshi could mess up a stamped image using a stamp platform!!! On the one in the next photo, the impression wasn’t quite good enough so I did it again, not realising that because I’d used paper instead of card, on the first impression the stamp stuck slightly and the paper moved fractionally when I lifted the lid of the platform. When I did the second impression, I got a doubled, blurred image! Grrrrrr. The tree branches weren’t too bad and I could get away with that, but the base part looked a mess. I blended it out with my alcohol pen and managed to salvage it!

Here are the other completed stamped images.

Finally, I matted and layered the toppers onto A4 white card folded to A5. Again, I experienced problems because the paper I’d used for the toppers was too thin, and I got a bit of buckling and creasing when I layered them, so the finish isn’t that great…

The final step was to stamp the sentiment on the bottom. I used my green archival ink for that, and again used the stamp platform.

One single finished card, which shows what this stamped image should look like when you don’t go and blur it!

I actually made our neighbour’s card before I did the set, and I should have inked first with distress ink and then added less Infusions, which would have given a better result, but you live and learn!

I began by taking a mask from my stash. Some time ago I made a card with lots of butterflies and frames on it, and had a frame-shaped piece of card with six butterflies cut out of it on the cutting machine. I laid this down on top of the card base and sprinkled Infusions over it (Violet Storms from set 1).

This is the finished card. I didn’t really like it much as the outlines were a bit blurred. I went around the outside of the frame and butterflies with my white marker pen, and then defined the wings of the butterflies with a silver glitter pen and the addition of some stickles.

The final step was to add a silver peel off for the sentiment, and this doesn’t show up very well! Not a great effort.

Why do I find cards so unsatisfying to make?? Perhaps if I enjoyed doing them more, I’d do them better!


PS Today is the second anniversary of the day I finished my chemo! Where on earth has the time gone?

Saturday, 14 October 2017

A WOYWW Visitor and More on Infusions Mini-Album

Today Margaret (Glitterandglue) spent the day with me – she is down in Devon, about to attend a course on Pergamano being held locally. She really didn’t want to come all this way down and not meet up, and we had a really lovely day. I’d set up the table in my studio so that we could both work in there, but we didn’t actually do anything except natter and have a Really Good Time!!

My hubby was out, so she and I shared a home made soup and bread lunch. I’d made broccoli and Stilton soup, and a plaited challah loaf, followed by stewed apple and  custard and we tucked in!

She had brought some absolutely fabulous Pergamano pieces that she’d made. Here she is with some of them displayed on the table.

A detailed shot of the pieces.

The little pyramids are a selection from a total of 24 which she made as an Advent Calendar. Each one is numbered, and they are all different. They have a painted design on one face, with the number on the opposite face, and on the other two faces, panels of Pergamano work in different patterns. These parchment covers slide up the ribbon loop at the top, exposing a box underneath, with the ribbons attached to the top. The sides of the boxes can be opened in order to insert a chocolate or other small gift in each one. They were utterly and completely exquisite – I couldn’t believe the fineness and detail of the work. The flat triangular piece in the centre of the table is a card – the three triangles open to reveal a small card inside.

Margaret had, of course, brought her Pergamano kit with her, ready to use on the course, and she got it out to show me – there are lots of different tools for embossing and for piercing, and two different mats for these processes. She was going to get me going on this but when I saw just how tiny and detailed the work was, and how incredibly time-consuming, I knew it wasn’t for me – it reminded me of my abortive attempt to learn Honiton lace making before I was married – incredibly intricate work that you have to do for weeks before you get anything worthwhile to show! I may be a patient person when it comes to my creativity, but there are limits!!!

I admire Pergamano greatly. It looks like a combination of lace and embroidery, and the designs can be very pretty indeed. Having seen it being done for the first time, I admire even more the people who do it. As Margaret says, when you see images of it online, they are always close-up photos, and you don’t really get a correct impression of just how tiny the patterns are.

I think I shall stick to mixed media and playing with stuff that makes lots of texture and colour, and above all, mess!!

After she had gone, I spent a couple of hours in the studio, working on the Infusions Mini-Album again, and tonight I finished making the tags for Volume One of the album. Here are the latest photos.

I had originally decided that I wouldn’t put any text on the front of the “Stamping” title page tag, but decided to go ahead and do that after all.

The reverse of this page is as I left it when I completed it back in September. This page shows my wild grasses stamps on an Infusions background.

Moving on to the next page in the album, we come to the water droplets page. This is a stamp from Designs by Ryn, and one of my favourite – it is incredibly realistic.

Turning that page over, we have the painted flowers page.

Finally, the Versamark stamping page.

I added more Infusions to the back of this tag. You can see that the reverse of the page has not been decorated. This will be covered with endpaper of the album.

The final photo shows the set of blotting up sheets that I created. After sprizting each tag, rather than wasting the wet Infusions on the craft sheet, I blotted it up with some small square cards I'd cut for this purpose.

Not sure what I’m going to do with them all yet, but in the meantime I shall add a distressed edge using Black Soot distress ink. I’m getting quite a collection of these now.

Tuesday, 20 October 2015

Card Factory 2015–Two Bee Cards

First Two Bee Cards

My next collection of cards for the Card Factory is on the theme of bees. I have made two so far.

I began by inking up some backgrounds cut from offcuts of card from other projects in the Card Factory, using my new Fossilised Amber distress ink, smooshing and spritzing it on my craft sheet and dragging the card pieces through the wet ink. I always keep my offcuts in case I want to make something smaller with them – waste not, want not!!

01 Fossilised Amber Inked Backgrounds

First Card

The first card has a die-cut window with a bee in it, with its wings embellished with Glossy Accents.

I embossed one of the inked backround pieces, using a Fiskar’s texture plate in a honeycomb pattern, using my Cuttlebug.

02 Honeycomb Embossing with Fiskar's Texture Plate

It didn’t show up very much, so I inked over the top, using my brayer to apply Vintage Photo distress ink to the raised pattern, and then I distressed the edges with the same ink, using a home-made ink blending tool.

03 Inking Embossing with Brayer

I cut a window in the top, using one of my new Dorice circle dies. It was really funny about these dies. I ordered them some time ago on Ebay, and was told there was a fairly long delivery date on them. I was convinced I had received them, and couldn’t find them anywhere, and got very frustrated looking for them, turning the place upside down and wasting lots of energy in the effort! Then I got an email last week saying they’d been dispatched, and a few days ago, they arrived! Did I dream them? Anyway, I am glad they did eventually turn up, and I hadn’t lost them after all!

04 Cutting the Window with Circle Die

After cutting the window, I stamped my medium bee from Stampotique Originals onto another offcut of card, using sepia archival ink.

05 Stamping the Bee

I inked the background with more Fossilised Amber distress ink, using an Inkylicious Ink Duster.

06 Inking the Bee Background

Here is the window with the bee in it. I embellished its wings with Glossy Accents.

07 The Bee in the Window with Glossy Accents

I matted and layered the honeycomb piece onto some thin brown card with a slightly marbled effect, and then mounted it onto a white A5-folded-to-A6 sized piece of card which I had previously distressed around the edges with Fossilised Amber distress ink. Here is the card completed card.

08 Completed Card

The sentiment was stamped on another offcut of card, using one of my clear sentiment stamps that I got when I first started, and I’m afraid I don’t know the name of the set or the manufacturer. This small strip was matted onto the same brown card as the main part of the card, after I’d inked it with a little Fossilised Amber and distressed the edges with Vintage Photo distress inks.

Second Card

For the second card, I wanted to make a grid background, stamping with the tiny bee that came with the medium bee stamp I used for the first card. I worked out a suitable spacing for alternately spaced rows of bees and I’ve kept a note of this in the packet with the stamps so I can refer to it again. It took quite a while to work out, and then a little while longer to draw out on the background piece, but at least this way I get a nice even result, and it’s worth the trouble, I think.

I stamped the small bees using sepia archival ink, stamping right over the edges of the background piece to give a nice overall effect. You can see the grid lines I have drawn.

01 Stamping the Bees on the Grid

I took the circular piece of honeycomb that I saved from the first card after I’d cut the window, and inked the edges, and those of the background piece, with Fossilised Amber distress ink, using my home-made ink blending tool.

02 Stamped Bees on Inked Background

I stamped the circular piece using the medium bee stamp, and heat-embossed it in gold. I made another sentiment strip the same as for the first card.

As before, I distressed the edges of the A5-folded-to-A6 white card base with Fossilised Amber distress ink, and assembled the card.

03 Completyed Card

I have got several more background pieces inked and ready to be made up into more bee cards for this set.

Related Posts Plugin for WordPress, Blogger...