Showing posts with label Rubber Stamping. Show all posts

Monday, 24 December 2018

Teabag-Beebag Art

Today I made a birthday card for a beekeeping friend, with a grungy brown colour scheme.

I began by stamping a bee image onto a teabag which I had dried, emptied and ironed.

01 Stamping the Bee on the Teabag

02 Bee Stamped on Teabag

Later, I redid this, using black archival ink, because the sepia didn’t stand out enough.

I inked a piece of scrim mesh with Pumice Stone Distress Stain.

03 Inking the Mesh

I took a piece of A4 cardstock for the card base and folded it in half, and inked it lightly with Pumice Stone and Frayed Burlap Distress inks, after which I spattered it with water and blotted it off.

04 Inking the Card Base

The edges were distressed with Tea Dye Distress Ink.

05 Distressing the Card Base

I tore a piece of hand-made paper along a ruler to make it the size I wanted, and distressed the edges with Tea Dye and Vintage Photo Distress Inks.

06 Distressing the Hand-Made Paper

Again using Pumice Stone and Frayed Burlap Distress Inks, I distressed a piece of printed card, which I have place on top of the original to show the difference.

07 Inking and Distressing the Patterned Paper

Assembling the card topper. I stuck the printed paper down onto the hand-made paper with double-sided tape, and the mesh was adhered with spray adhesive.

08 Assembling the Card Topper

I used the same spray adhesive to attach a small piece of gold punchinella.

09 Attaching the Punchinella

Completing the card topper. I spattered the back papers with white acrylic paint, and attached the replacement teabag, which I had also spattered with white acrylic. The text was written with permanent black pens.

10 The Topper Completed

The completed card, with a couple of gold peel-offs.

11 Completed Card

Friday, 28 September 2018

Box for Floral Mini-Album–Completing the Inside Pieces

Today I finished embellishing the insides of the pieces to make up the box.

I had a bit of a struggle because at each stage I was far from satisfied, and kept adding more layers until it looked more or less OK. Here are the steps.

First of all, I tore the music fragments from the paper napkins into smaller pieces, and stuck them down onto the box pieces with soft matt gel medium.

15 Preparing to Stick Music Fragments Down

16 Music Fragments Stuck Down

17 Music Fragments Stuck Down Close-Up

They looked far too obvious and there was nothing to link them together. I added more Worn Lipstick and Seedless Preserves Distress Oxides and spritzed it lightly with water, and dried it with my heat gun. Before and after:

18 More DOs on Music Fragments Before and After

19 All Pieces with Extra DOs on Music Fragments

It still needed something to link the fragments together so I stamped some music onto the pieces without an acrylic block in order to get a nice random effect.

20 Music Stamping

I still wasn’t pleased with it. The stamping was too hard looking and it just looked messy. I added some Vintage Photo Distress Ink with an Inkylicious Ink Duster which improved things somewhat, especially after I’d spritzed it with water again. On the following photos, it looks as if the music stamping has disappeared, but it is still there, but a lot more subtle, merging into the backgrouond.

21 Vintage Photo DI on Music Stamping

I finally decided to add some white acrylic paint spatters and this definitely helped produce the effect I was after.

22 Paint Spatters on Pieces

23 Paint Spatters on Pieces Close-Up

Coming back later after they were dry, I decided to make them a bit more subtle by adding some Black Soot Distress Oxide with an ink blender. I spritzed it lightly with water and then dried it with my heat gun. Again, before and after:

24 Extra DO on Paint Spatters

The finished pieces.

25 Box Inside Pieces Complete

The final step was to touch up the edges and the borders on the outside of the pieces with black acrylic, and when they were dry, I gave all the pieces the heavy books treatment overnight to ensure that the pieces would be absolutely flat, and ready to be assembled into the two boxes.

I was hoping that my metal embellishments would arrive today from Ebay. I may have to wait until next week. At least I can begin assembling the box in the meantime, but I cannot finish the outside until they arrive because I need to cut the covering papers to shape, to fit around them and give a nice professional finish.

Monday, 20 November 2017

Backgrounds with Infusions, Inks and Gesso

Returning to my Card Factory for this year, over the last couple of days I have made some backgrounds using gesso with infusions, and distress inks, and have die cut circles from some of these backgrounds.

The materials used to create the gesso backgrounds.

I spread gesso onto a piece of A6 card with a palette knife, and immediately sprinkled on a mixture of Slime and Rusty Car Infusions from set 2, and spritzed it lightly with water, and brayered over it, which spreads the infusions into parallel streaks. This is the sample at top left. There was quite a mess on the desk so I brayered this on to the subsequent cards, adding Infusions as I went. The colour gradually got more blended with the gesso with each subsequent sample and all are useable and slightly different.

The finished samples.

I mopped up the rest of the mess onto an A4 sheet and added more gesso and Infusions as required. For this sample, I brayered over the top of the right-hand side of the sheet and left the other side to dry naturally.

This is the final mop-up sheet, with further Infusions added, but no additional gesso.

These two A4 sheets can be used in other projects.

From the four small A6 samples, I die cut two different sizes of circles and also some larger circles from some printed card I had in my stash.

I am keen to use up quite a bit of stuff that’s been hanging around for years – much of this card is far too brightly coloured for my taste now, or not of a pattern or design that I am that keen on, being part of sets I bought many years ago. With a bit of treatment they can look perfectly reasonable.

I cut a piece of orange card 5 inches by 10 inches and folded it in half. You can see the original colour on the scrap underneath the background piece.

I applied gesso all over, using a foam brush. This left a lot of unsightly brush marks, so I spritzed it with water and then blotted it with a crumpled up piece of kitchen paper. I applied more gesso and repeated the process until I was happy with the result.

I heat dried it, and then stamped it using the Artistic Stamper Harlequin stamp (C349) without an acrylic block, stamping fairly randomly and taking care not to press the whole thing down each time. I stamped using Iced Spruce Distress Ink, and then distressed the edges with Aged Mahogany, using a home-made ink blender.

In the above photo, you can see the matted die-cut circles laid on top. This circle will be stuck down in the centre and the card base folded in half, and I will stamp something on the die cut circle and/or add some form of embellishment.

Moving on to the next piece, I took a piece of yellow A4 card and folded it to A5, In the following photos you can see its original colour, and the results of toning it down with gesso and inks, giving a much softer and more subtle effect.

I applied the gesso, again using a foam brush, but taking care to use only vertical and horizontal brush stokes, and then spritzed it lightly with water. Once I’d heat dried it, I used the same harlequin stamp, this time with Tattered Rose Distress Ink. Using an ink duster I added a bit of Cracked Pistachio Distress Ink randomly, and finally distressed the edges with some Aged Mahogany Distress Ink (visible on the photo above). Again, you can see the die cut circles chosen to go with this particular sample.

I decided to create a different background without gesso on another piece of the yellow card. For this one, I blotted off the Iced Spruce on the harlequin stamp, over most of the surface of the card until the stamp was clean. Then I added a small amount of Slime Infusions (from set 2) and repeated the stamping process, this time using another Artistic Stamper stamp: Calligraphic Mat #12, us9ing Aged Mahogany Distress Ink.

I applied a little Hickory Smoke Distress Ink with an ink duster, and also some Milled Lavender, both with an ink duster and with a home-made blending pad to distress the edges somewhat. Finally I added a small amount of Blackcurrant Infusions from set 1, randomly here and there.

Here are the three backgrounds so far, with the die-cut circles not yet glued down. I am not sure how I am going to embellish these yet, but they will all need the heavy book treatment to flatten them out properly before then.


Monday, 16 October 2017

Card Factory 2017

My stash of cards had pretty well run out so I really had to get down to making some more. I’ve decided I don’t really enjoy card making that much, so it’s a bit of a chore but I haven’t quite got to the stage when I’ve given up altogether and resorted to buying them!

Rather than falling into my usual trap of turning each card into a major work of art and taking far too long over it, I kept these ones simple. I shall continue to make special cards when the occasion demands, but the limited time I have available to spend in the studio (dictated by busyness elsewhere, and being too fatigued to do anything) is now dedicated to art projects I actually want to do, such as mixed media, books, experimenting with materials, etc.

Today I made seven cards. Six were more or less identical and were on a production line basis, and the other was a one-off which I made for our neighbour whose birthday is today.

I really struggled with these! Such a simple project, but if anything could go wrong, it did… I was feeling a bit brainfogged which really doesn’t help, and I made quite a few mistakes which were not able to be remedied unless I started again, so I pressed on. As a result, they are not my best effort!

I began by making a circular mask. Rather than setting the cutting machine up (couldn’t be bothered – too tired!!), I cut a 2-inch circle with a punch, which of course had to cut quite near the edge of the paper, so I stuck this with a glue stick to a larger piece, out of which I had cut a rough circle, larger than the punched circle. This is the back of it.

Turning it over, it provided enough margin not to allow anything to stray beyond the edges.

I had a couple of abortive attempts. I sprinkled Infusions (The Sage from set 1) through the mask onto two of the sheets I’d cut for the card toppers. In order to get enough coverage, they came out much too dark to stamp on. The one on the right was slightly lighter, and I thought I’d run over it lightly with a wet brush to make the texture smoother, but this was a disaster. Bin time.

It was hard to know what order to post the photos in, because in order to photograph the process I went through, I had to get ahead of myself a bit – I used the first successful circle as a guide for the rest. Here it is on my light panel, ready to use as a guide.

I lined up the next sheet over it, and you can just see the circle showing through.

I was then able to lay the mask on top. I had to do it this way because the mask was bigger than the small sheet and I had no way of lining it up otherwise.

I’d decided the only way I could get the effect I wanted, with good coverage of colour but with a little of the Infusions texture, was to ink the circle first with distress ink using an Ink Duster (I used Bundled Sage), and then add the absolute minimum of Infusions on top. This worked well.

Here is the distress ink going on, through the mask.

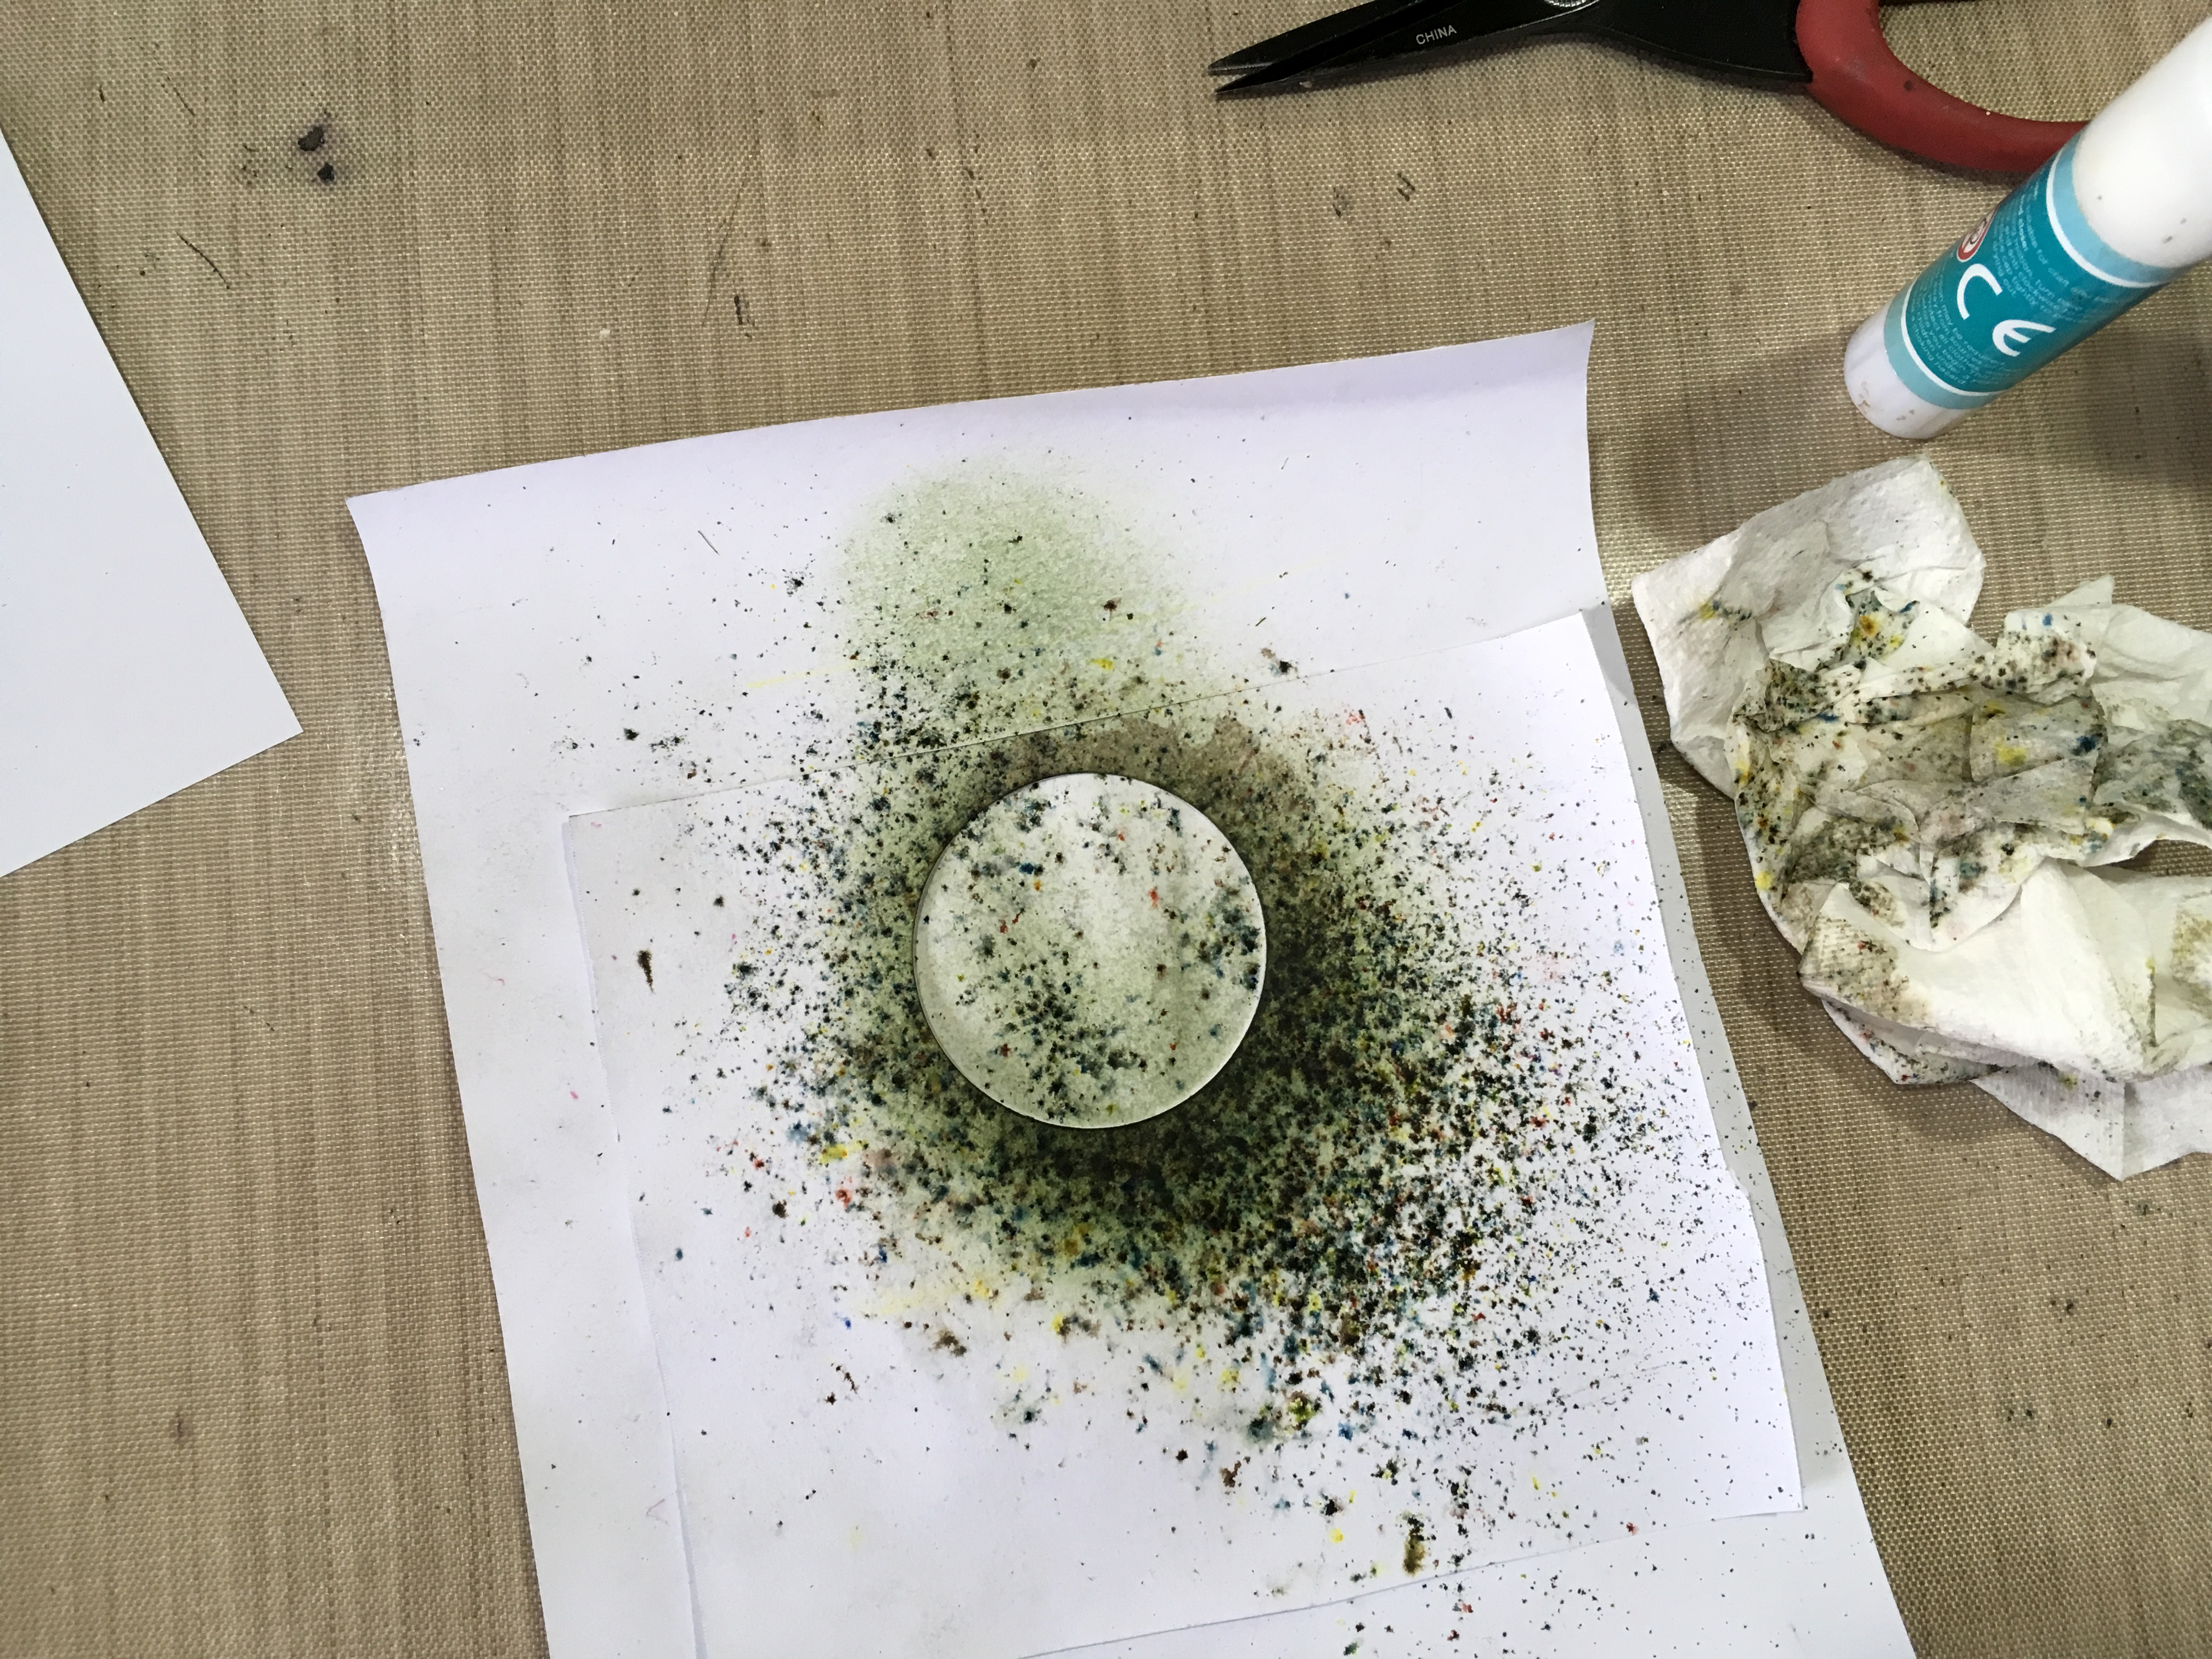
I picked up the whole thing and without disturbing it, carried it back to my main work area and sprinkled on the Infusions through the mask.

I spritzed it lightly with water without moving the mask.

I left it to stand for a minute or two and then blotted it off.

Finally, I removed the mask and dried it with my heat gun.

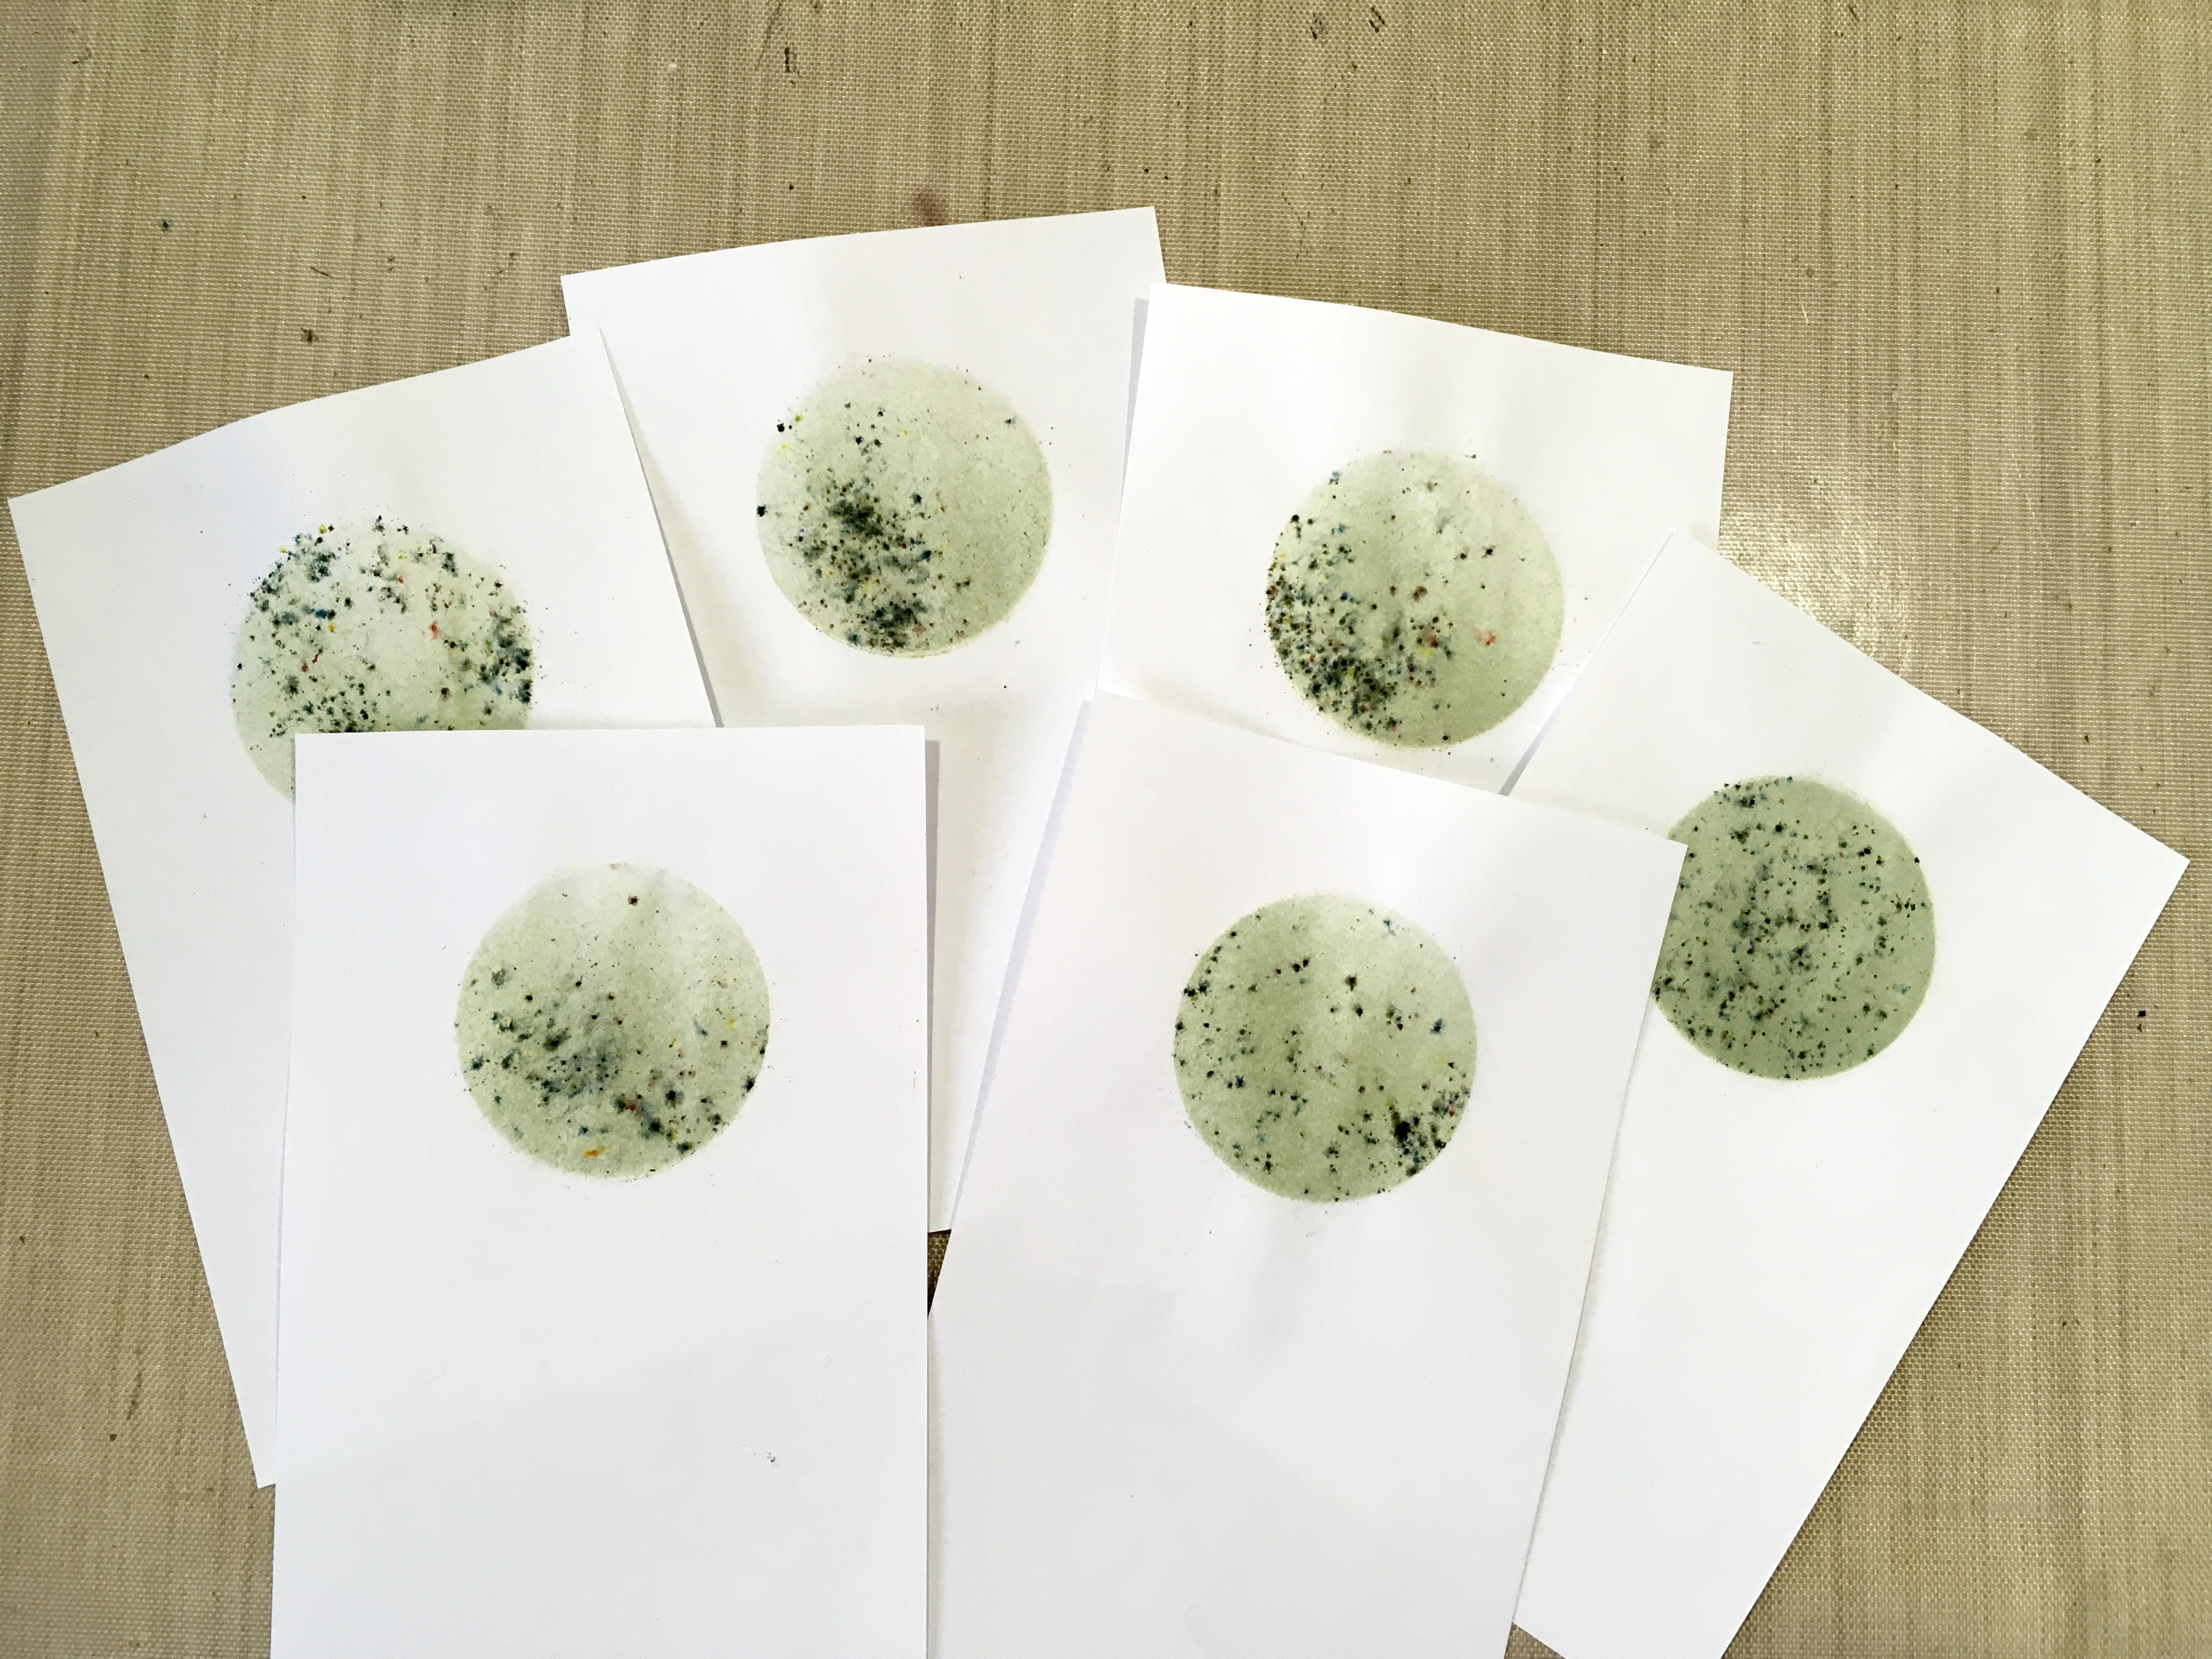
Here are the finished circles.

The problem was, I should have cut these pieces from card, and not from paper. The paper didn’t stand up too well to getting wet, and it buckled a bit.

I got out a selection of stamps, to choose which designs I wanted to use.

Using my wonderful new stamp platform, I stamped a single image onto each circle, using black archival ink.

This flower head one didn’t have a stem – you could use one of the stem stamps from the set but it meant setting it up on the stamp platform, and I thought it would be simpler just to draw one in with a black marker pen afterwards.

I have always been hopeless at stamping. The stamp platform is a marvellous tool for someone like me, but would you believe it… Only Shoshi could mess up a stamped image using a stamp platform!!! On the one in the next photo, the impression wasn’t quite good enough so I did it again, not realising that because I’d used paper instead of card, on the first impression the stamp stuck slightly and the paper moved fractionally when I lifted the lid of the platform. When I did the second impression, I got a doubled, blurred image! Grrrrrr. The tree branches weren’t too bad and I could get away with that, but the base part looked a mess. I blended it out with my alcohol pen and managed to salvage it!

Here are the other completed stamped images.

Finally, I matted and layered the toppers onto A4 white card folded to A5. Again, I experienced problems because the paper I’d used for the toppers was too thin, and I got a bit of buckling and creasing when I layered them, so the finish isn’t that great…

The final step was to stamp the sentiment on the bottom. I used my green archival ink for that, and again used the stamp platform.

One single finished card, which shows what this stamped image should look like when you don’t go and blur it!

I actually made our neighbour’s card before I did the set, and I should have inked first with distress ink and then added less Infusions, which would have given a better result, but you live and learn!

I began by taking a mask from my stash. Some time ago I made a card with lots of butterflies and frames on it, and had a frame-shaped piece of card with six butterflies cut out of it on the cutting machine. I laid this down on top of the card base and sprinkled Infusions over it (Violet Storms from set 1).

This is the finished card. I didn’t really like it much as the outlines were a bit blurred. I went around the outside of the frame and butterflies with my white marker pen, and then defined the wings of the butterflies with a silver glitter pen and the addition of some stickles.

The final step was to add a silver peel off for the sentiment, and this doesn’t show up very well! Not a great effort.

Why do I find cards so unsatisfying to make?? Perhaps if I enjoyed doing them more, I’d do them better!


PS Today is the second anniversary of the day I finished my chemo! Where on earth has the time gone?

Related Posts Plugin for WordPress, Blogger...