Showing posts with label Polyfilla One Fill. Show all posts

Tuesday, 13 June 2017

Infusions Mini-Album–Completing the Title Pages

This afternoon I made the title pages for Books 2 and 3 of my Infusions Mini-Album. One or two of them had to be left to dry, and I will complete them after this.

Again, I used up some of the reject/spare pages. For the first one, I should have chosen a stencilled one that didn’t use Polyfilla because there was one of those to come, but once I realised, it was too late! I added text with the white Uniball Signo marker pen and a black archival pen, and added some white Rub’n Buff and Treasure Gold to the raised parts.


I did the text in the same way on the Stencil with Polyfilla title, and added some Treasure Gold to the raised parts.

Simple text on the next one. I think I had it in mind to add some hand-embossed leaves and flowers to this one so I hope I’ve left room for them!

For the Added Texture title page, I thought I’d use a mixture of textures. From left to right: bleached mulberry bark (I tore off a tiny fragment), coarse pumice gel, regular matte gel (for attaching the mulberry bark), glass bead gel medium, and finally crackle paste. These have to be left to dry overnight, especially the crackle paste which needs time in order for the cracks to develop.

Acrylics title page. In addition to the usual pens, I also added some shading to the text, with a soluble graphite pencil and a fine wet brush to blend it out.


For the Gesso title page, I decided not to add any card, but simply to spread gesso onto the squashed toilet roll, taking the gesso over the black painted edges. As I needed two pages for this title (to make the page numbers work), I added some texture by patting the surface gently with the flat of the palette knife, taking this effect over onto the right-hand page a little, but leaving a smooth central part for writing on. Once this was done, I sprinkled on some Black Knight Infusions from Set 1 and some In the Navy from Set 2, and spritzed it with water and left it to stand for a bit, before drying the surface with my heat gun. These pages will have to be left overnight for the gesso to dry completely.


Finally, the Cling Film title. I am not sure whether what I have done will work! I wanted to leave some cling film on the page, so I scrumpled some up and attached it with a thick layer of heavy body clear gel medium. Once it is dry, I shall trim off the excess cling film. This was attached to a spare stencilled piece with a very blurry image on it, from about the third impression of a wet stencil. We shall have to see how this turns out after it’s been left to dry.


Wednesday, 24 May 2017

Mixed Media Anniversary Card

Today is our 31st wedding anniversary. Goodness, is it really that long? What a lot has happened since we got married!

Last night, still catching up with myself after my busy week last week, and then having to rest a lot, I finally sat down in my studio and got a card made for my lovely hubby. I originally planned on making something quite simple because of time, but while I was resting, I came across Marta Lapkowska, a brilliant Polish mixed media artist, on Youtube, and some of her fabulous video tutorials on creating texture from anything you could think of – an absolute gift to a complete texture junkie like Yours Truly. https://www.youtube.com/watch?v=cAOJwdQqokQ and this inspired me to do something a little more challenging.

What fun I had!

Here’s what I did, step by step.

First of all, I selected one of my sheets of watercolour paper with stains on it from drying teabags, and tore one out.

In my stash I’ve got quite a few sheets of hand-made paper which I think were originally part of some wedding service sheets that I collected up after a wedding service once. I knew they’d come in useful for art – they are gorgeously soft and textured. Again, I tore out a piece, to give a nice uneven edge, and I was delighted to find that the tearing gave almost the same edge as the natural deckle edge of the hand-made paper.

Next came the teabags. I selected a few from my stash.

I cut them open and put some of the tea on my palette. The rest was thrown away. I should really have a blitz and empty all my stash of teabags (I’ve got hundreds!) and save the tea to put on the garden! Also, the teabags would take up a lot less room without the tea in them. One day, one day…

I mixed the tea with some Polyfilla One Fill, my preferred (cheap) texture paste. It was pretty dry so I added some water.

I opened up the teabags by tearing them, and saved the cut off strips which were interestingly textured.

I applied a few of the teabags to the bottom half of the hand-made paper piece, using soft matte gel medium.

I then applied the tea/Polyfilla mixture in places, to add texture, being careful not to obscure the more interesting part of the teabag layer. I wished I had screwed the teabags up more, instead of laying them down flat, as I would have got more interesting texture that way.

After drying this, I thought it needed a bit more texture added, so out came the coarse pumice gel medium – I love this oh-so-gritty stuff!

Using soft matte gel medium, I stuck down the teabag stain piece to the top of the hand-made paper, and also added a bit of this gel medium over the textured part, to make sure that it didn’t flake off.

Time for stamping. I am soooo glad I bought my wonderful Tonic Stamp Platform! I’ve never been very good at stamping and this tool makes it so easy. Also, I was able to do several test pieces (e.g. on the left of the picture) to experiment with the layout of the grasses stamps – this set is from Inkylicious, and is “Create a Collage – Meadow.” I did the stamping in several stages so that I could get the layout I wanted, using sepia archival ink.

I stamped so that the stems of the grasses extended below the bottom of the teabag stain piece, and extended them, and filled any gaps, with my fine sepia marker.

Here’s a detail shot of the stamping.

Painting with tea and coffee! I made up some strong tea and coffee for this.

Painting with the tea. I used a wide fan brush for this and dabbed it on more or less all over the background piece.

Using a finer brush, I painted the coffee around the edges and to emphasise some of the texture a bit more. I had to do this several times, drying in between with my heat gun – I don’t think I made the coffee quite strong enough.

At this stage I also painted a bit of tea over the teabag stain behind the grasses to emphasise it, as this was getting a bit lost in the design.

I thought the background needed a bit of colour variation, so I used some Infusions. To the bottom left I added some Lemoncello from set 1, and to the right, some Rusty Car from set 2, and these certainly added a bit of richness and depth.

I felt a distinct need to add a bit of complimentary colour to all this brownness, so I dug out my Crushed Grape Dylusions spray ink and spattered some of that on, and I think it improved it a lot.

The edges needed darkening, so I did this with some black acrylic paint. I also added some of this around the texture to emphasise it more.

I thought the whole thing needed lightening a bit, so I masked off the teabag stain piece at the top, and spattered the rest with white acrylic paint.

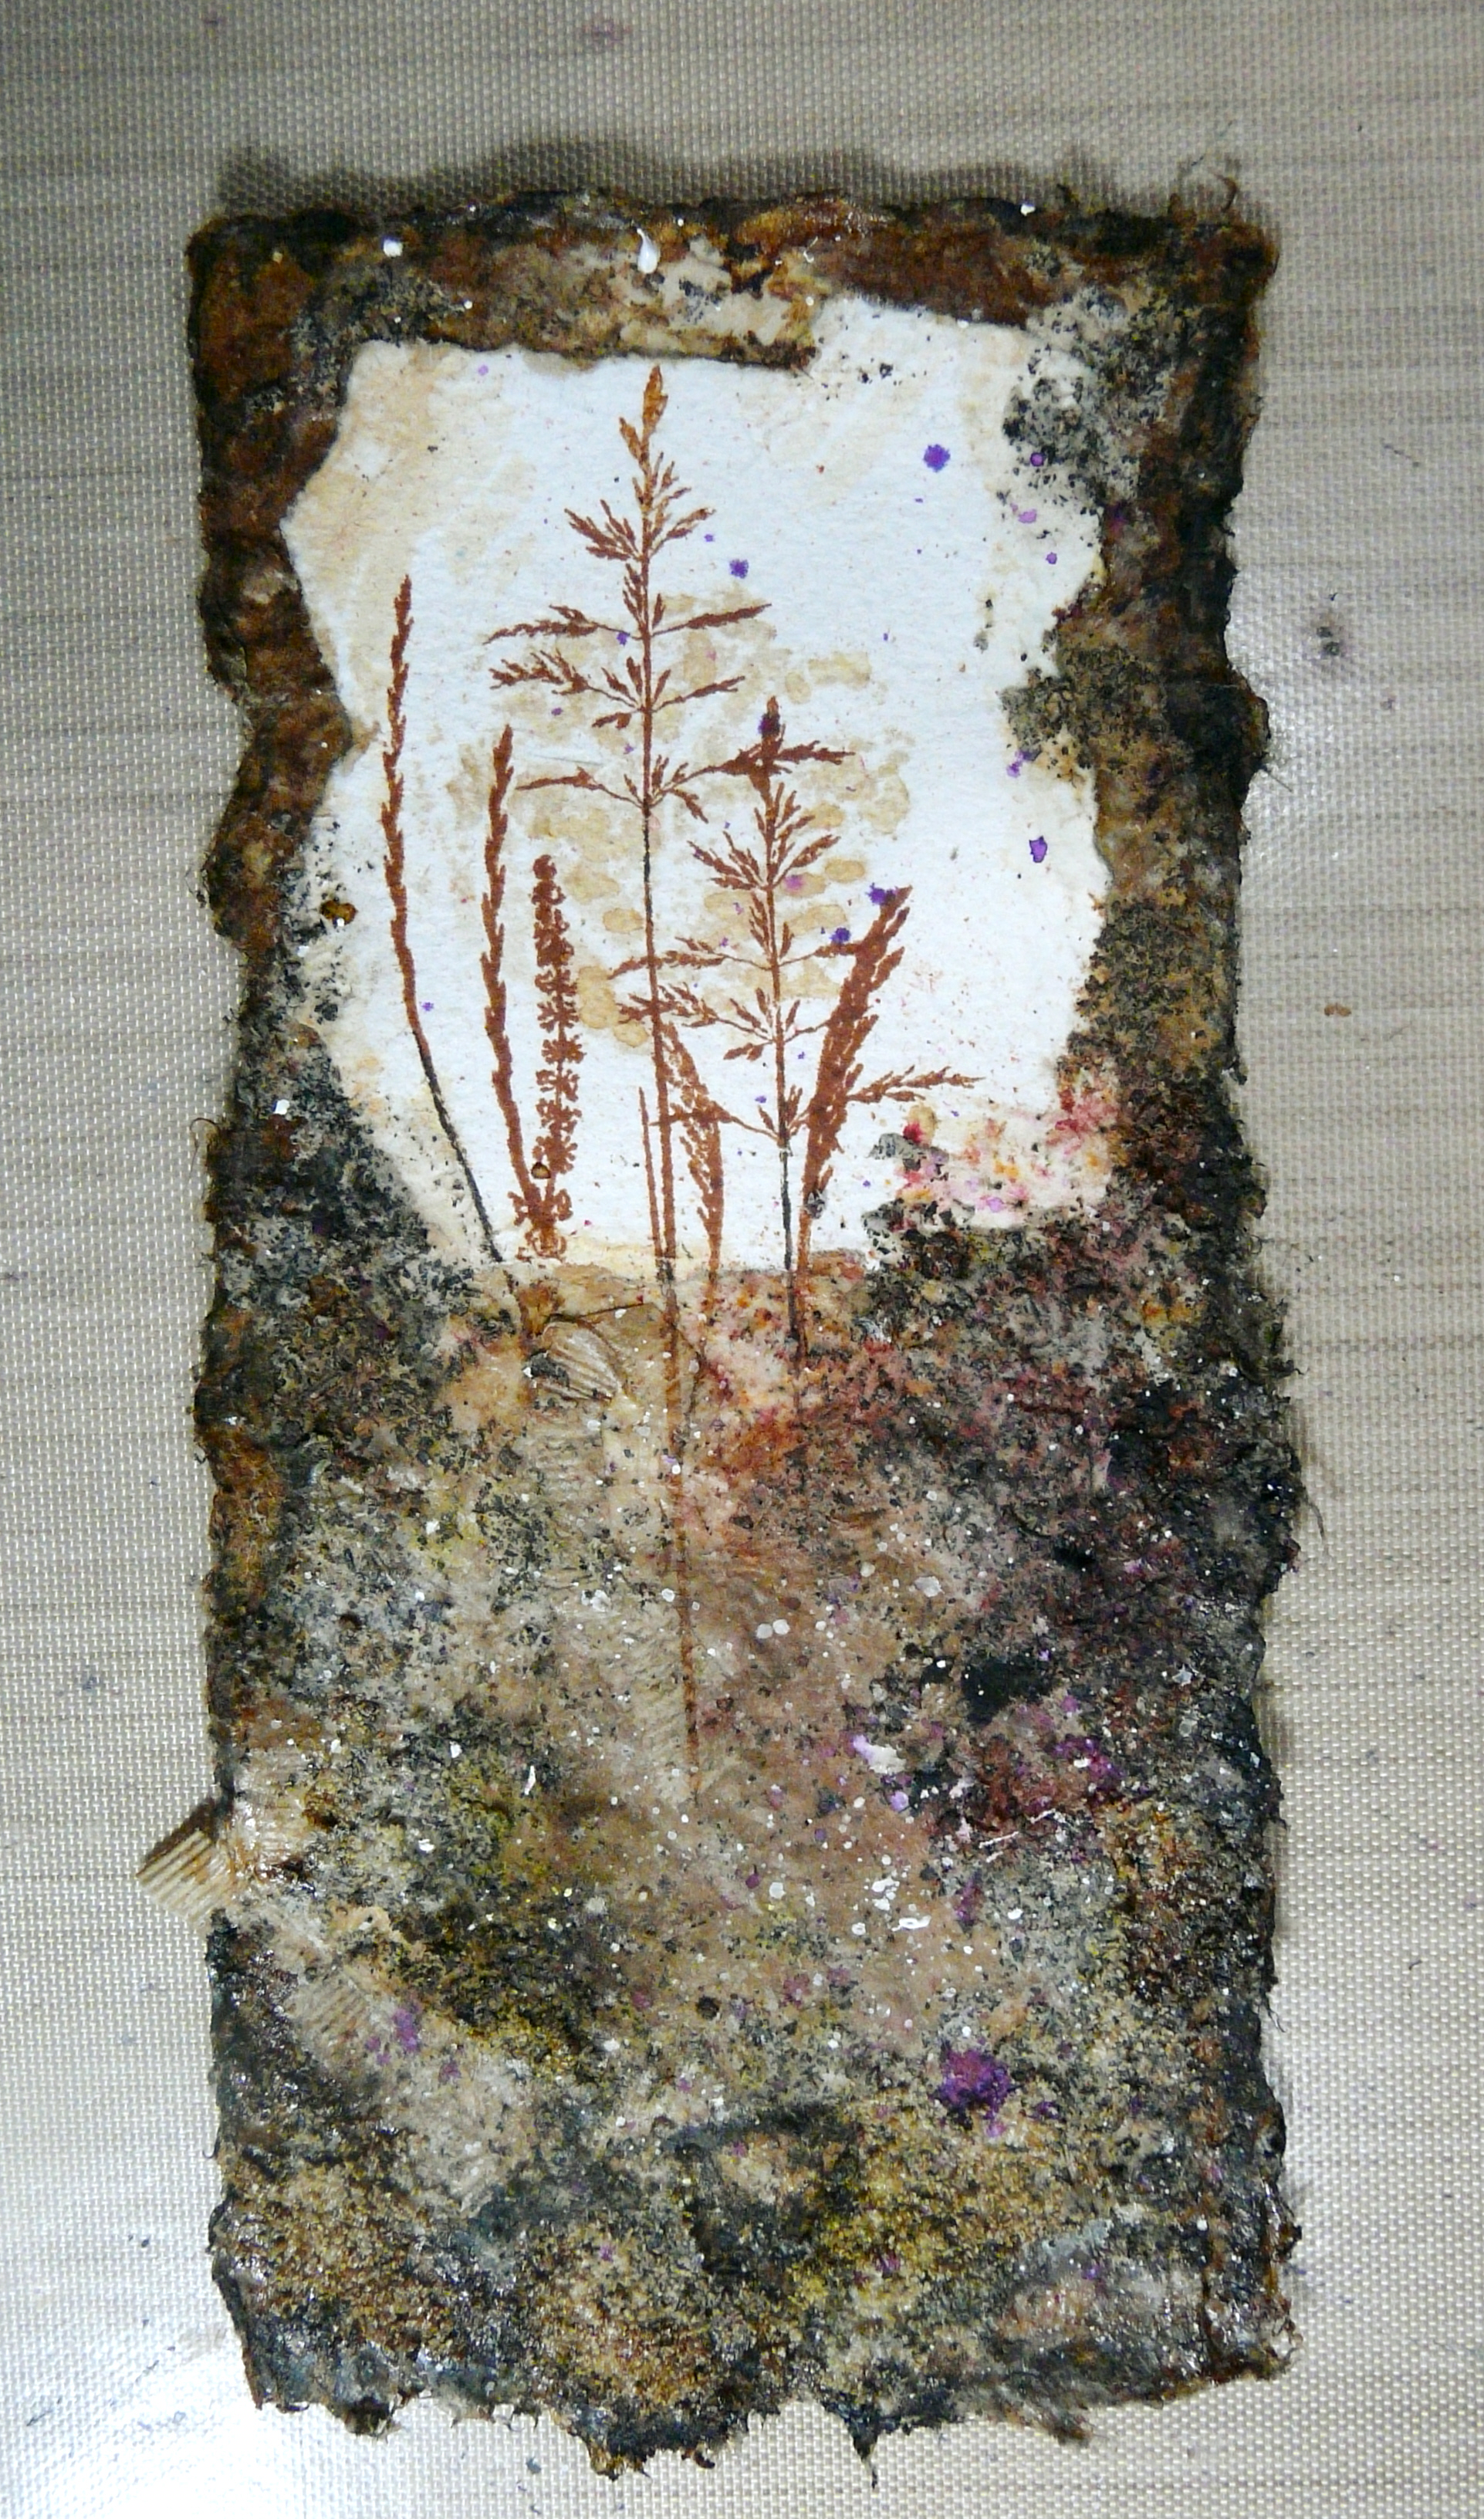
This was the result.

Originally I wasn’t going to put a sentiment on the outside of the card, but there needed to be something to balance the design, so I decided to add one. I went through my pile of rejects and spares from my Infusions mini-album project and found this one that exactly complemented my design. I tore off the bottom and wrote the text using my Uniball white Signo marker pen, and then darkened the edges, especially along the white torn top edge, with tea. I stuck this to the front of the card with regular matte gel medium, dabbing carefully over the text to prevent the water-soluble white from smudging, and afterwards touching this up where necessary.

To create the card base, I cut a piece of heavy white card and softened the edges with some more tea.

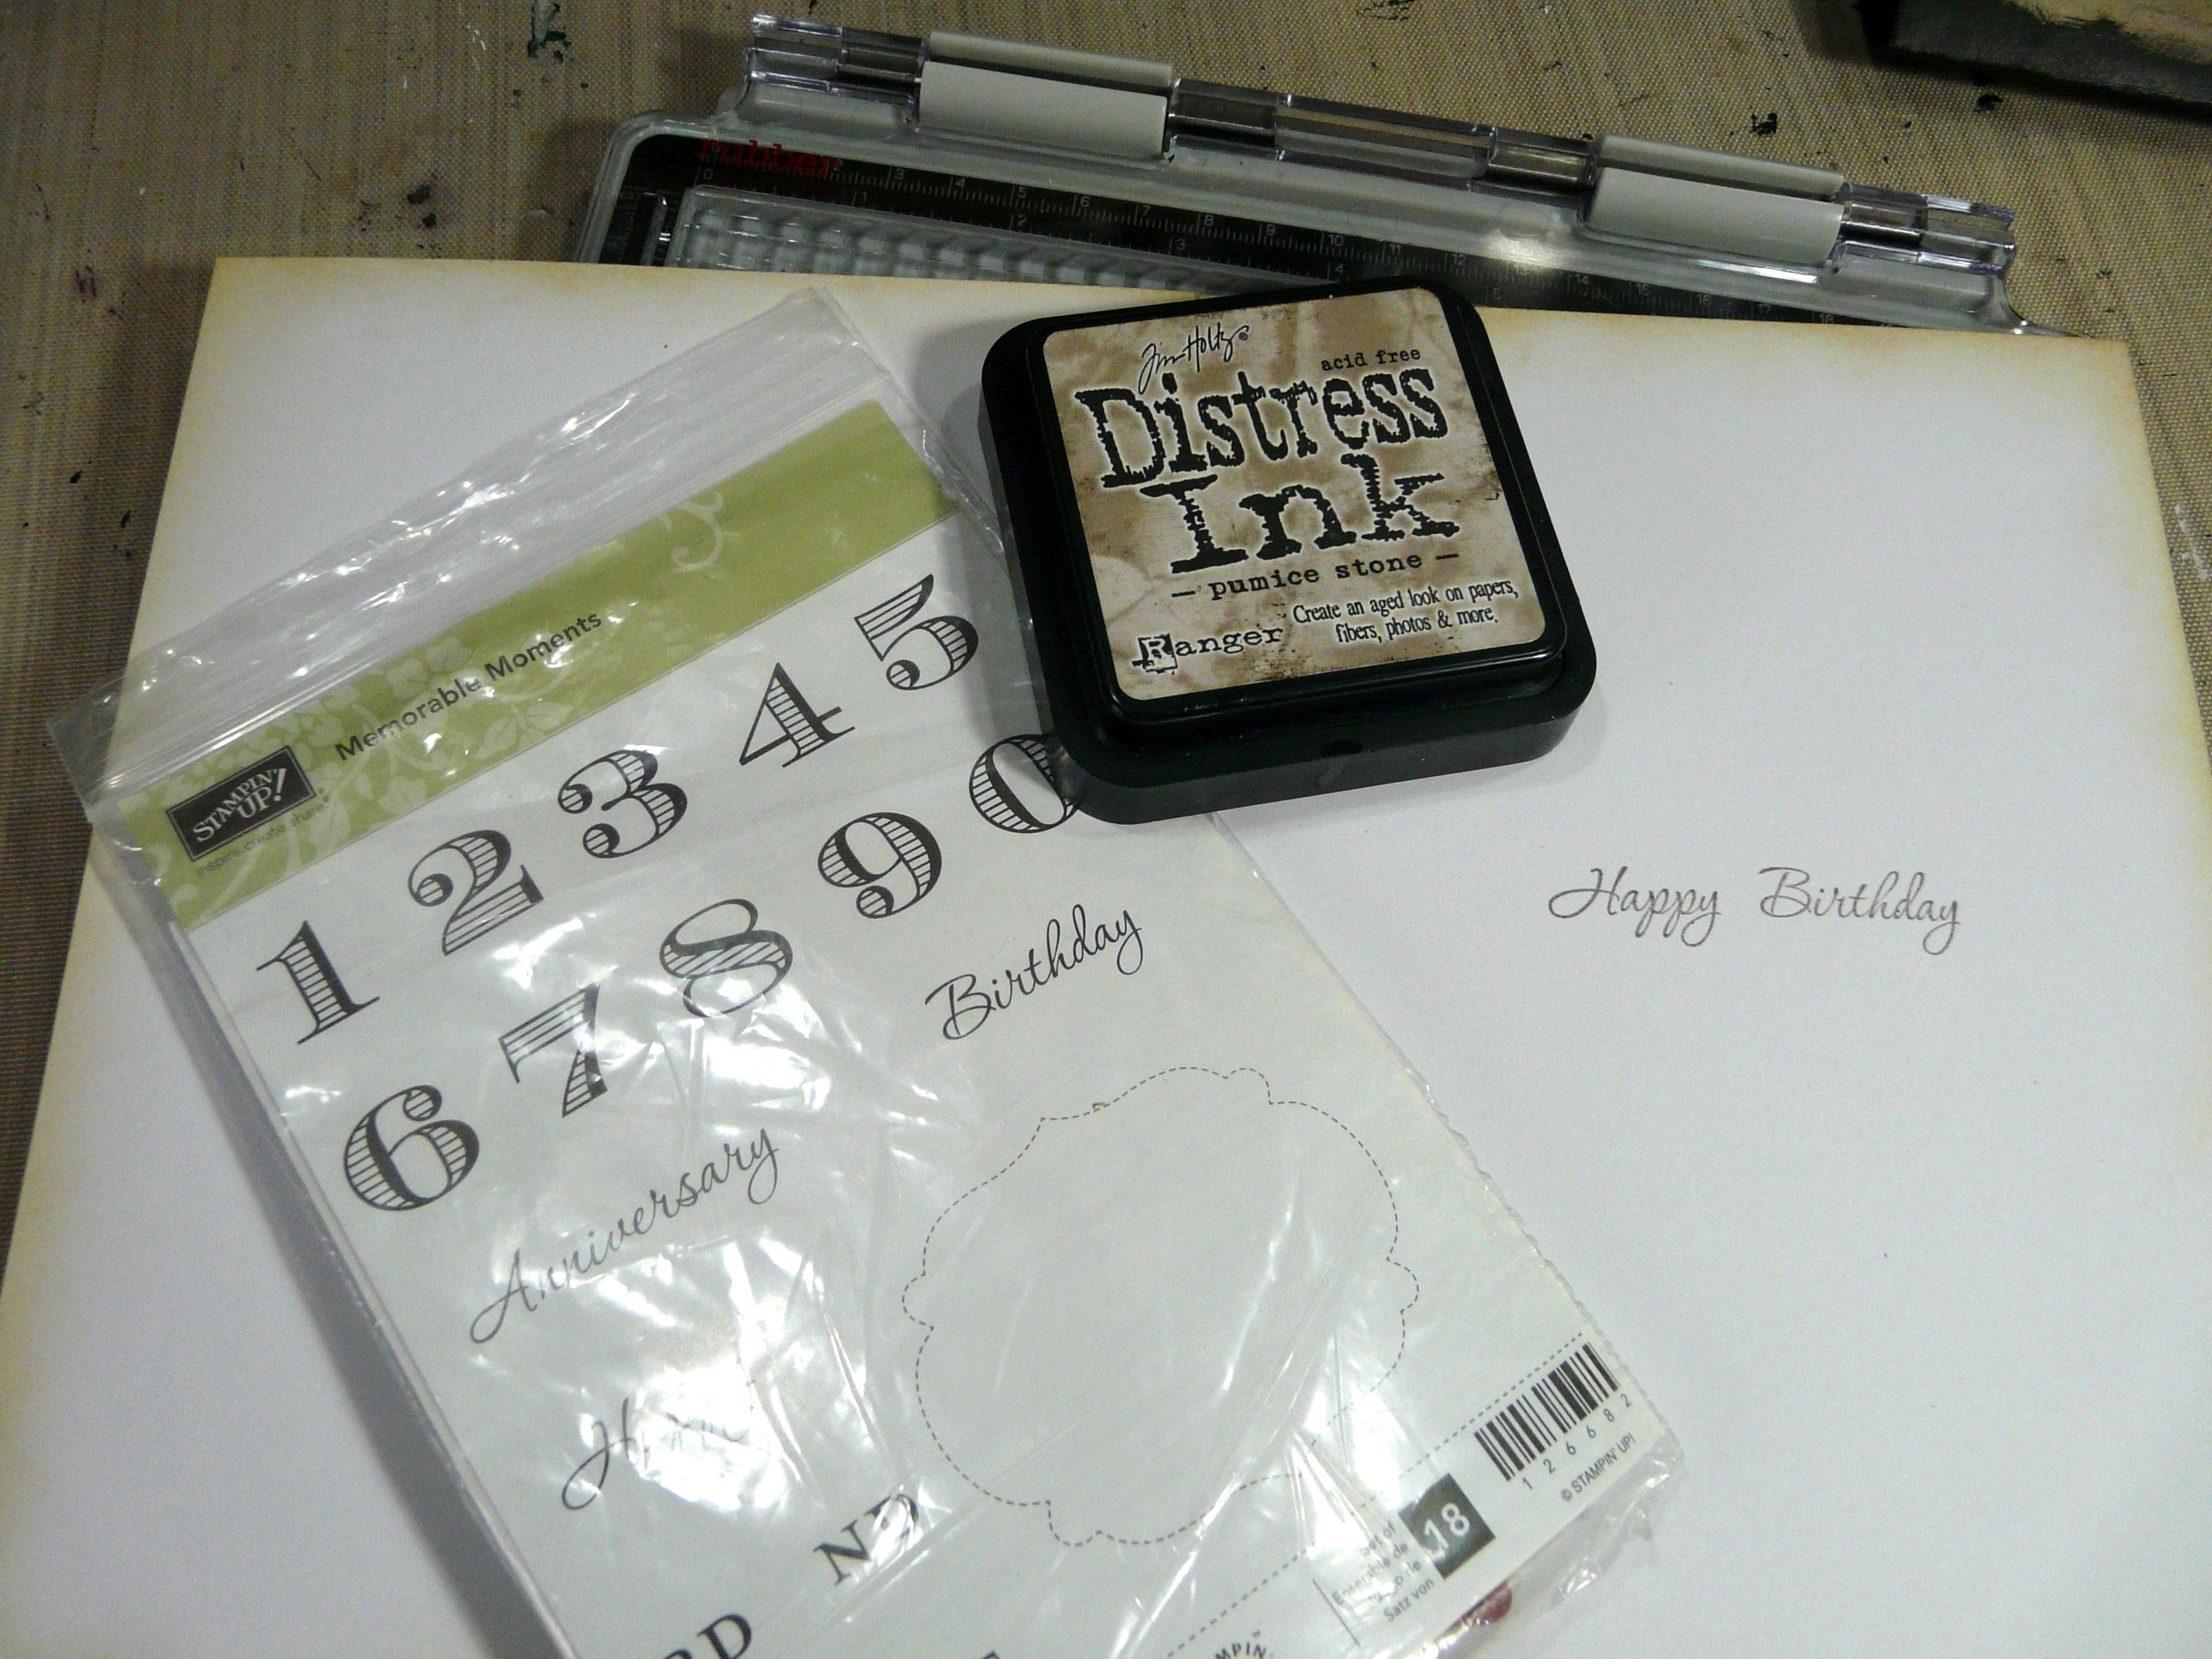
Inside, again using my wonderful stamp platform, I stamped the sentiment with sepia archival ink, using the “Memorable Moments” stamp set from Stampin’ Up.

To add a bit of interest, I made a couple of wide brush strokes across this sentiment with tea, using the fan brush.

I assembled the card using Scotch Quick Dry Adhesive which is a really good strong wet glue.
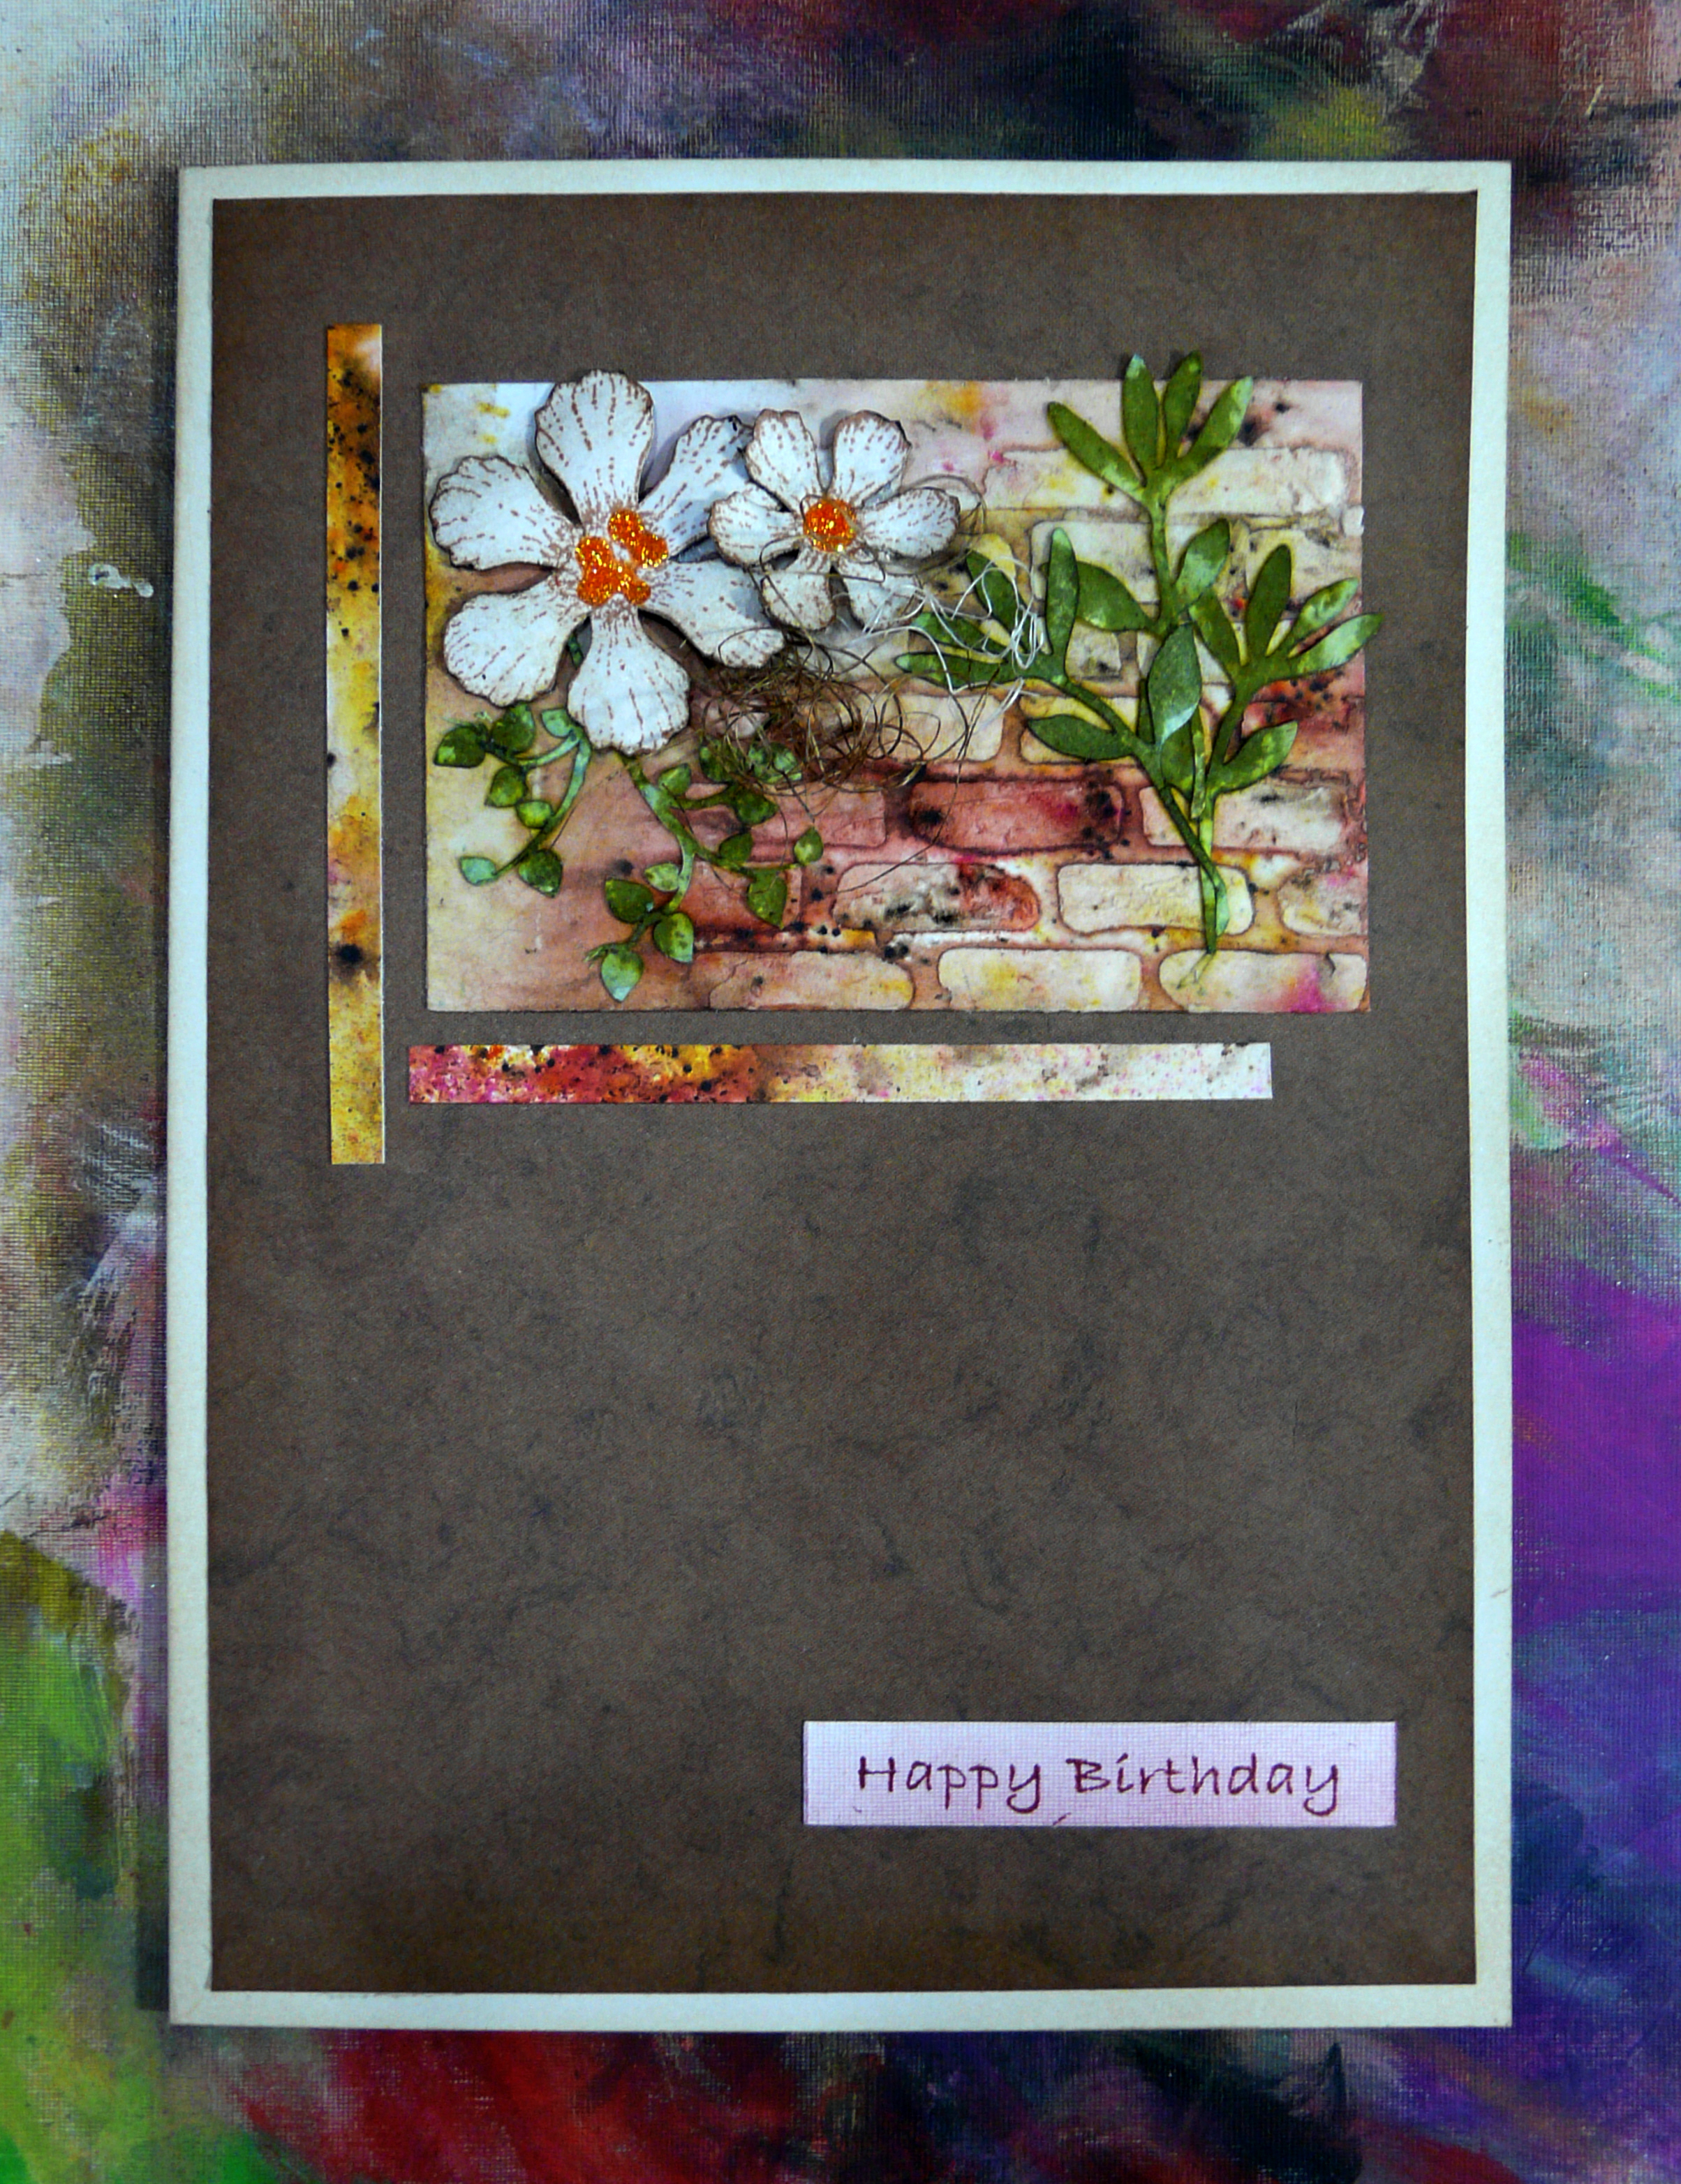
The finished card.

My hubby loves it!

Here it is, side by side with the other card I made recently, for his birthday last week.


Monday, 15 May 2017

Infusions Birthday Card for my Hubby

Panic stations! Suddenly remembered I hadn’t made a card for my hubby’s birthday at the end of this week, and I’ve got a very busy week ahead. I thought I’d better get my skates on.

My Infusions mini-album, that I have been working on for the past few weeks, has generated quite a few reject pages, and some perfectly good ones which I decided on balance not to include. These are still hanging around on my workdesk and will eventually find their way into my stash for future use, and I chose one today that I thought might make a nice card – it was one of the ones I made with Polyfilla through my own brick stencil, as I only needed one for the album.

I have a few tiny scraps left from my Infusions mask and spray 12 x 12 sheets that I made last year, most of which were used up on the Mamhead mini-album for the end-papers and cover. I have a few of the flowers and leaves left, and also a few of the Heartfelt Creations stamp/die cut combos I made some time ago, so rootling around in that little lot, I came up with enough materials to put together quite a nice card.

I began by looking out the pack of jute fibre I bought from Ebay ages ago. This is very fine and wasn’t quite what I wanted when it first arrived, but I thought with a bit of persuasion I could coil it up and make it do more what I wanted! Being a natural fibre, it absorbs ink pretty well, so I began by colouring a few strands, using Distress Stains in Walnut Stain and Vintage photo. I stuck the ends together with Scotch Quick Dry adhesive to make the whole thing a bit more manageable.

Once they were coloured, I wrapped them around the handle of a fat paintbrush and spritzed them with water. I held them there for a few minutes and gently dried them with my heat gun – a bit like setting hair!

When I pulled them off, they looked like this:

I was quite pleased that they had held their shape so well. All that was required was to tease them out a bit, ready for use.

I stuck the bundle onto the card with a little strip of masking tape.

I selected two of the Heartfelt Creations flowers which I’d already hand-embossed, and stuck them down onto the card with Pinflair gel glue, covering up the masking tape on the jute fibres.

I had cut a few leaf trails for the Mamhead album and I coloured these with two Distress stains, Forest Moss and Bundled Sage.


This gave a nice mottled effect which was a bit more natural-looking than a flat dark green.

I ended up needing another of the large ones, but this didn’t take long to do afterwards.

Assembling the piece.

I attached the leaf trails using soft matte gel medium, and added some Orange Peel Stickles (glitter glue) to the centres of the flowers. This was how it looked at this stage.

The Stickles and Pinflair glue take ages to dry, so I left the piece out overnight.

Next day it was dry, so I could complete the project. I folded a piece of white A4 card in half and inked the edges with Antique Linen Distress Ink – the white card was far too stark and bright. I found the last of some mottled brown card that I had in my stash which I’ve been anxious to use up, and cut it to size to mat and layer. The cut edges were very white so I inked those with Vintage Photo Distress Ink.

I also distressed the edges of the inside of the card with Antique Linen Distress Ink.

Time to use my wonderful new Tonic stamp platform for the sentiment inside! I tried it out the other day when I made my copper and sepia card. This time I used it side-to-side so I could put my card in. I did a few trial runs with scrap paper to make sure the stamps were correctly positioned.

The materials for stamping the sentiment. I used the Stampin’ Up “Memorable Moments” stamp set which is useful because you can mix and match the stamps. I used Pumice Stone Distress Ink, and as this is fairly pale, I stamped it three times. One of the great things about the stamp platform is the ability to stamp again in exactly the same place – very useful if you get an incomplete impression first time. I’ve never been that great at stamping, and I’m so glad I bought this new gadget!

I thought the inside of the card looked a bit bare, so I got out my bricks stencil and taped it in place, and used an Inkylicious Ink Duster and Antique Linen Distress Ink to create a bit of interest.

The finished result. The brickwork nicely echoes the theme of the front of the card.

The finished card.

The little strips forming a partial frame were in the box of scraps left from the Infusions 12 x 12 pages and I thought I might as well use them up! There’s not much left of that paper now. The Happy Birthday sentiment was in my stash – I think it was part of a pack of odds and ends I received as a gift from a friend some time ago.

A detail shot of the topper. My hubby loves his garden so I hope he will like this floral card. I don’t think it’s too girlie!

Phew! What a relief! Completed it in time!

Related Posts Plugin for WordPress, Blogger...